Christmas Card Display
Monday, December 17, 2012
The cork board that I bought was larger than I wanted to use so Loren cut the size down for me. After the board was the size I liked I just had to cover it in fabric. I just lined it up (which is extra simple when there's a grid pattern on the fabric!), held the fabric in place, and started stapling. I started the staples in the middle and just continued until the entire side was held in place. Then repeat on the opposite side.
To complete the remaining two edges, I folded the fabric like I would if I was wrapping a gift. After making sure the corners were straight, I finished up the stapling.
After the fabric was on, I just needed to add a ribbon to use for hanging the board. The ribbon I bought is a shimmery, silver color and is a wired ribbon. Honestly, I just guessed how long I needed the ribbon to be and stapled the two ends just inside the corners.
I made a little bow to put at the top and hung my little board up. I did realize that I am the worst at making bows, but even my pathetic little bow looked better than nothing.
I was really excited to add all the cards that we've received so far this year, and I really love the way they look all hung up.
I think the display looks so festive and fun with all the cards attached (though I'm hoping to be able to add a lot more!)! I'm happy to have a place to hang our cards so we can see them everyday. Such a quick and easy little project I'm a little annoyed with myself for not doing it years ago! What do you use to display your holiday cards?
Wednesday, May 2, 2012
I'd found this inspiration picture via Martha Stewart and decided to go with that idea. I knew that Loren would appreciate the somewhat symmetrical design and since I'd need his help with all the hanging him liking the idea is good. :) I picked up a bunch of frames from Michael's, just cheapies made even cheaper with my 20% off purchase coupon! I got the pictures in and started arranging the frames out on the floor.
I tried a couple different patterns but in the end we went with the second layout. There are no pictures of us hanging the frames because well it was tricky. There might have been swear words involved. And minor temper tantrums. And finally Loren just told me to go sit down and he finished all the hanging on his own. He is a good husband. It took a few hours to get them all hung but in the end it was worth it!
It took a little bit of time to get used to but now I love all the pictures! It's so fun to look at them all and see so many nice memories. And the way the frames are hung it's really easy to take the frames down so I can switch out the pictures often which is lovely! So, that's the photo wall adventure. Anyone else have a photo wall they love? I'm sort of itching to put another gallery up somewhere so I'll have to put my thinking cap on.
Monday, March 5, 2012
Thursday, March 17, 2011
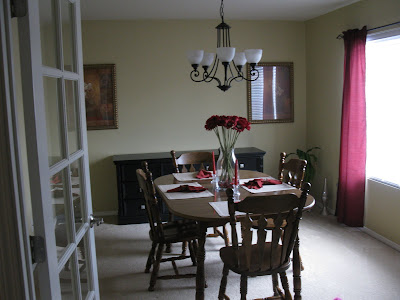 This left me with a big blank area right over the buffet. During a recent trip to Ikea I saw some photo ledges displaying lots of picture frames. And I liked it! I snatched up a few of the ledges and picture frames and headed home. Here's all the goodies I bought:
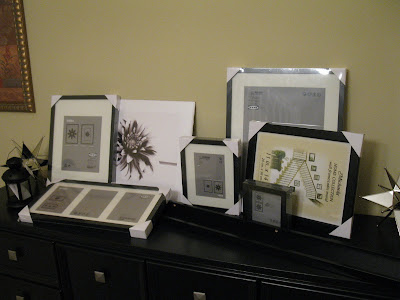 Loren started hanging the ledges up the other night and I was pumped. I told him where to put them and how I imagined it to look. He hung up the first ledge and it looked like this...
 |  |
Fail. That is not a winning photo ledge in any way. It was too high and to make matters worse when you looked into the room the light blocked everything! Grrr!!
So, we started over. I decided that instead of putting both ledges up maybe just one more in the middle of the space would be better. Luckily, these ledges are easy to install. I helped Loren with marking the wall so everything was straight but otherwise it's a one person job. There's just three screws that are used and then you cover them up with stickers so everything looks black and pretty. I forgot to take a close-up of the holes but their holes...you can figure out what they look like.
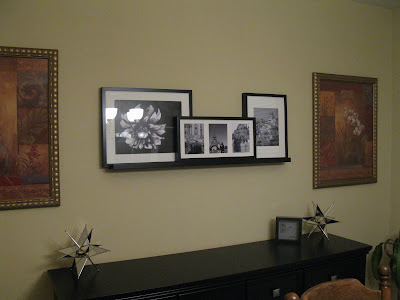
I used a picture I purchased from Ikea and some printed photos from Costco. I love it. Love it, love it, love it! I need to do something with the other pictures that were already hanging on that wall but I have a plan for 'em. :)
So, what do you think? Like the ledge? Anyone else used one before? I really like them!


