Pages

Showing posts with label Outdoor Improvements. Show all posts

Making a Tiny Backyard Functional

Friday, October 24, 2014

One of the biggest issues Loren and I have with our house is the tiny backyard. Even calling it a backyard is generous. It's more like a back patio. But, this summer we decided we needed to figure out a way to get more enjoyment out of the space.

We'd been dealing with this set-up:


It was okay, but not super functional. Especially if there were more than four people back there. So our goal was to make it more useful. At first we thought about just getting a different size patio table, but then we realized that maybe an outdoor couch or sectional would be better suited. And if we were having a BBQ or something we could just eat on the couch, that's what we normally do inside, why not outside?

The search for an outdoor sectional began, and I very quickly realized that they are extremely expensive. I was still keeping an eye out for some good deals but told Loren I was going to see about if there were any plans out there for making something ourselves. I found some plans that you built up some nice benches basically but people commented that they spent $600+ on the supplies, and I also saw some plans that involved using pallets but we just weren't sold on the idea. Finally after lots of Googling and Pinterest searches, I came across this tutorial from Be Happy...Be Me:


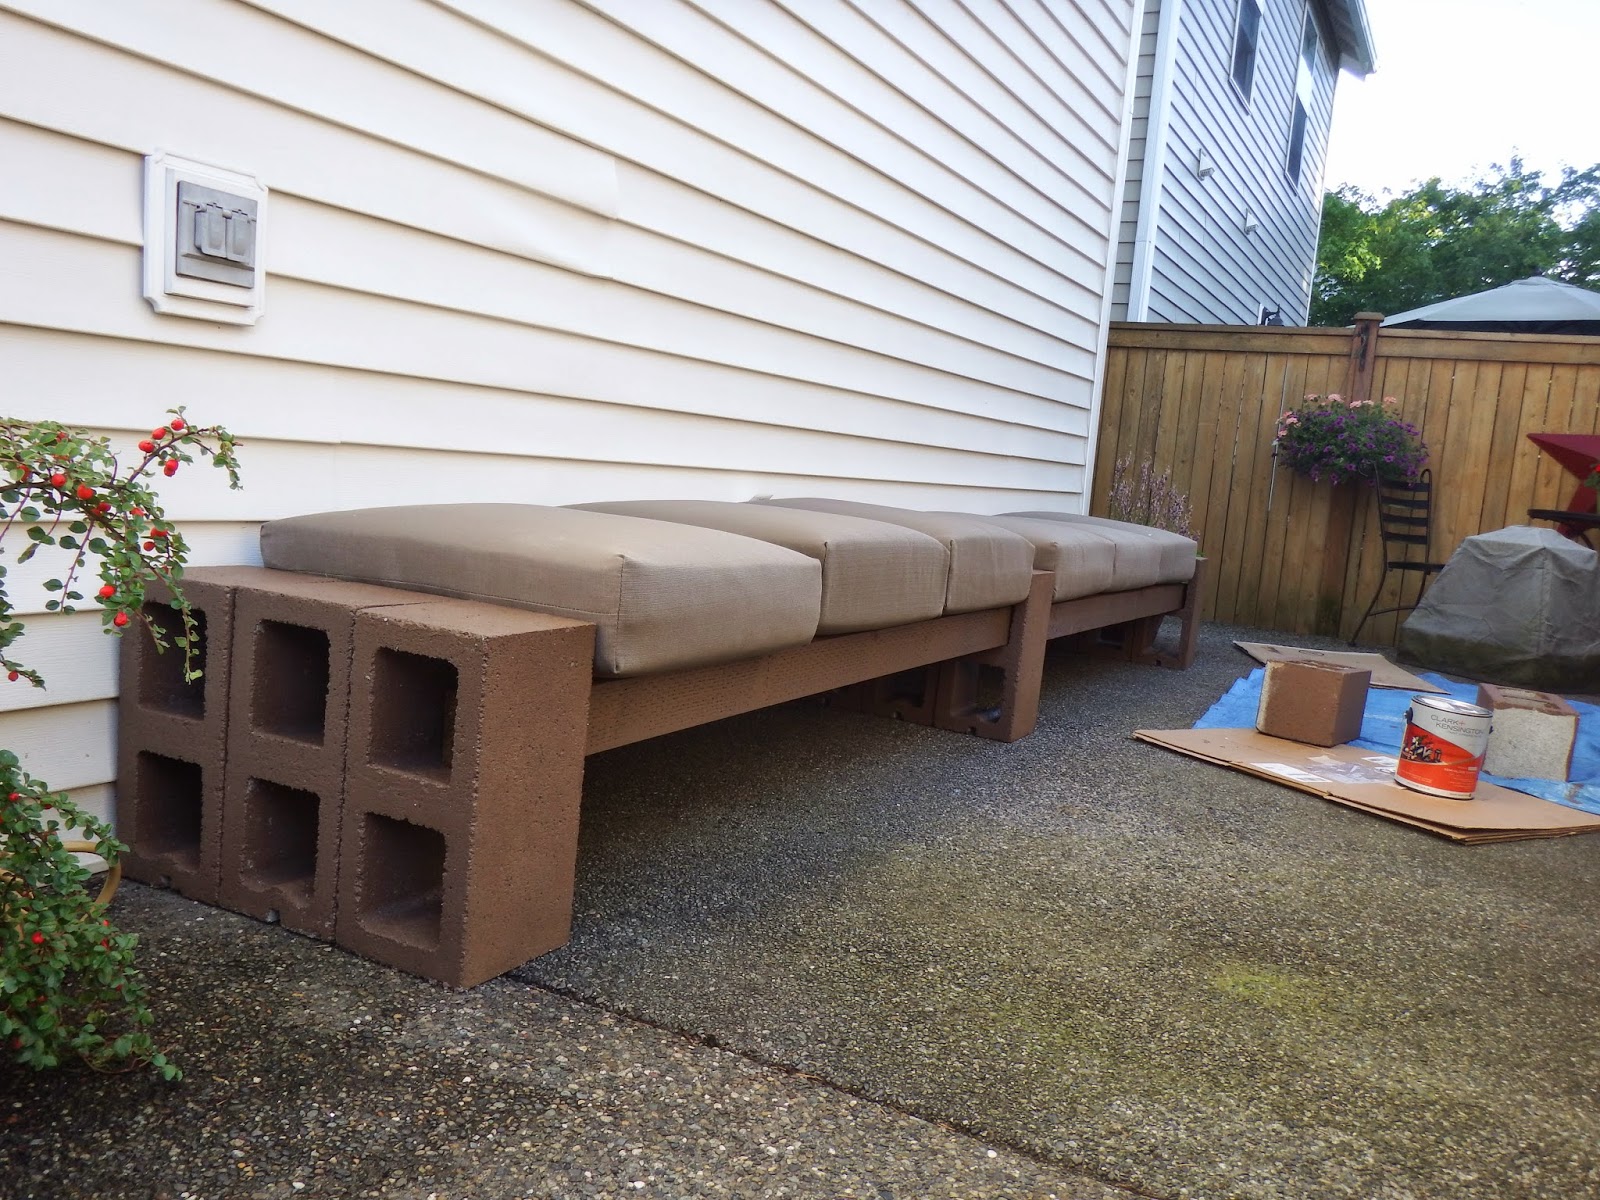
It was just what we needed! We got measuring to make this couch fit our space and decided to use six foot 4x4 boards with cinder blocks in the middle joining two sides together. We bought six 4x4's and 12 cinder blocks to assemble the couch. We also picked up some brown paint from Ace Hardware to paint the blocks and the front of the 4x4's that would be visible.


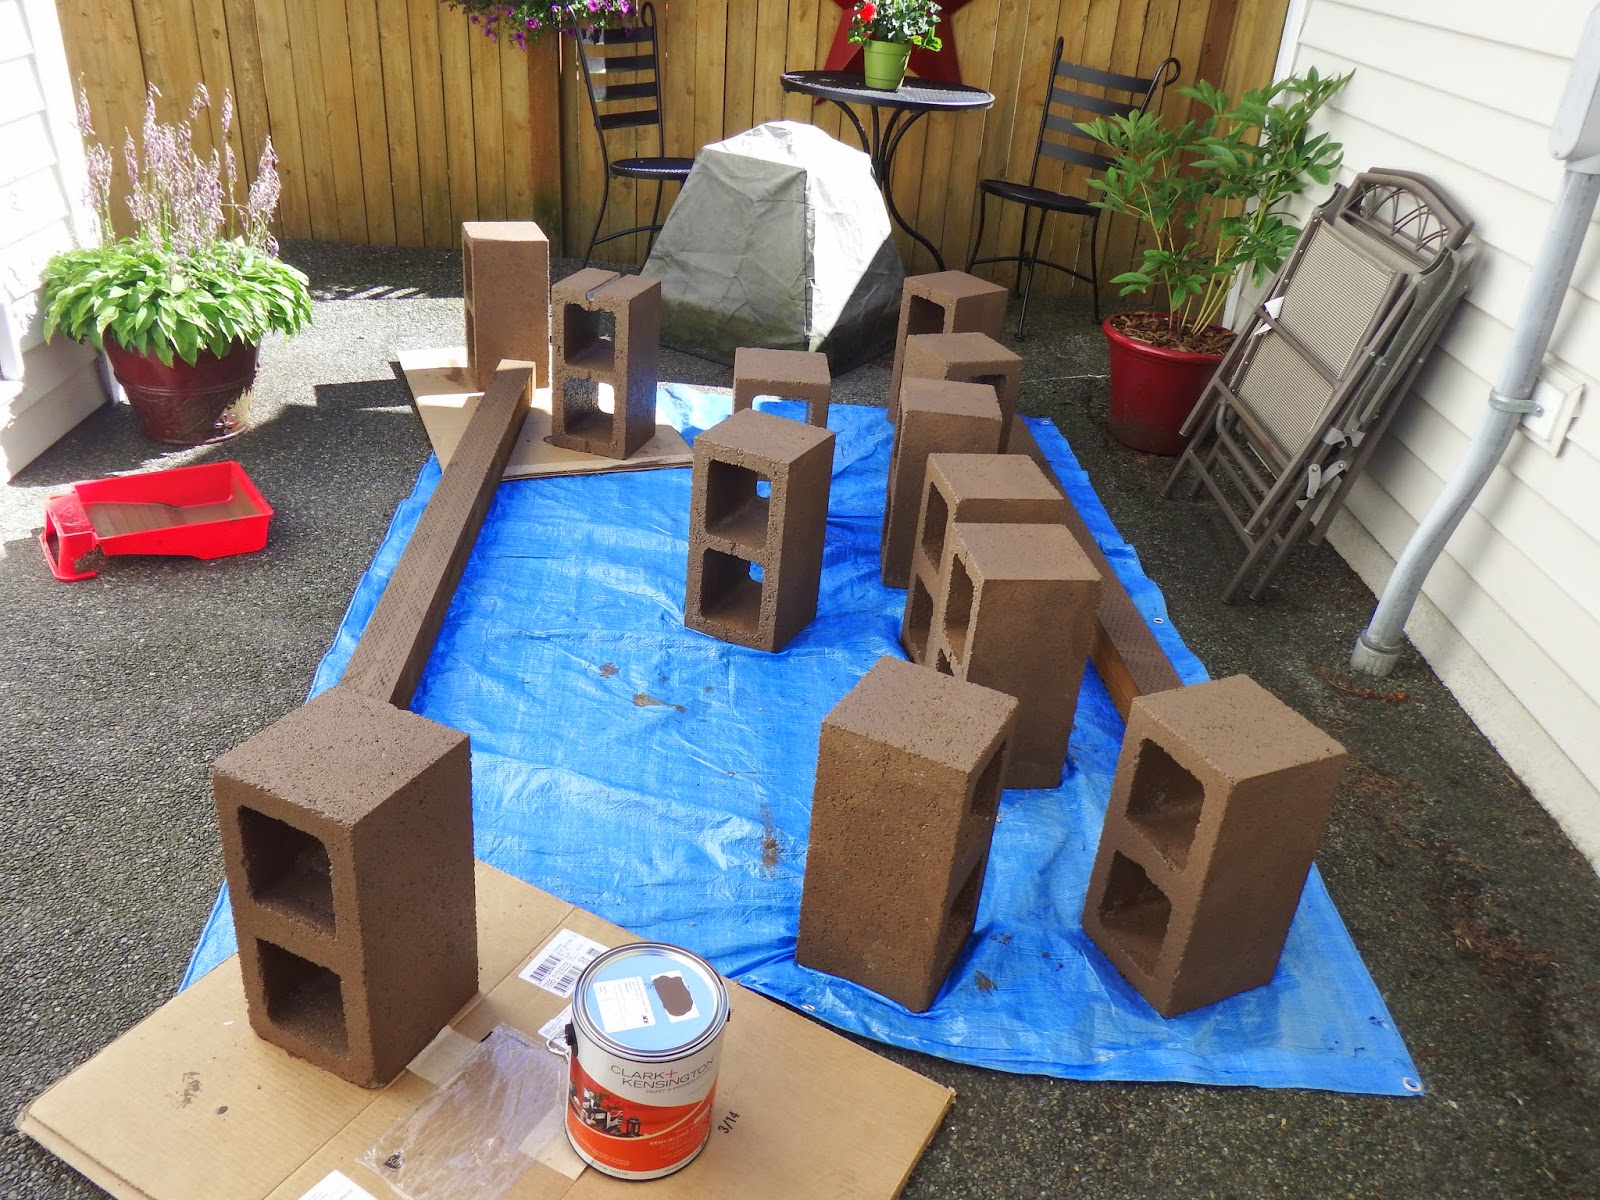
Let me tell you, painting cinder blocks is not fun. But we got it done and that was the majority of the work on this project. After the painted blocks were dry, Loren glued them together for extra stability.


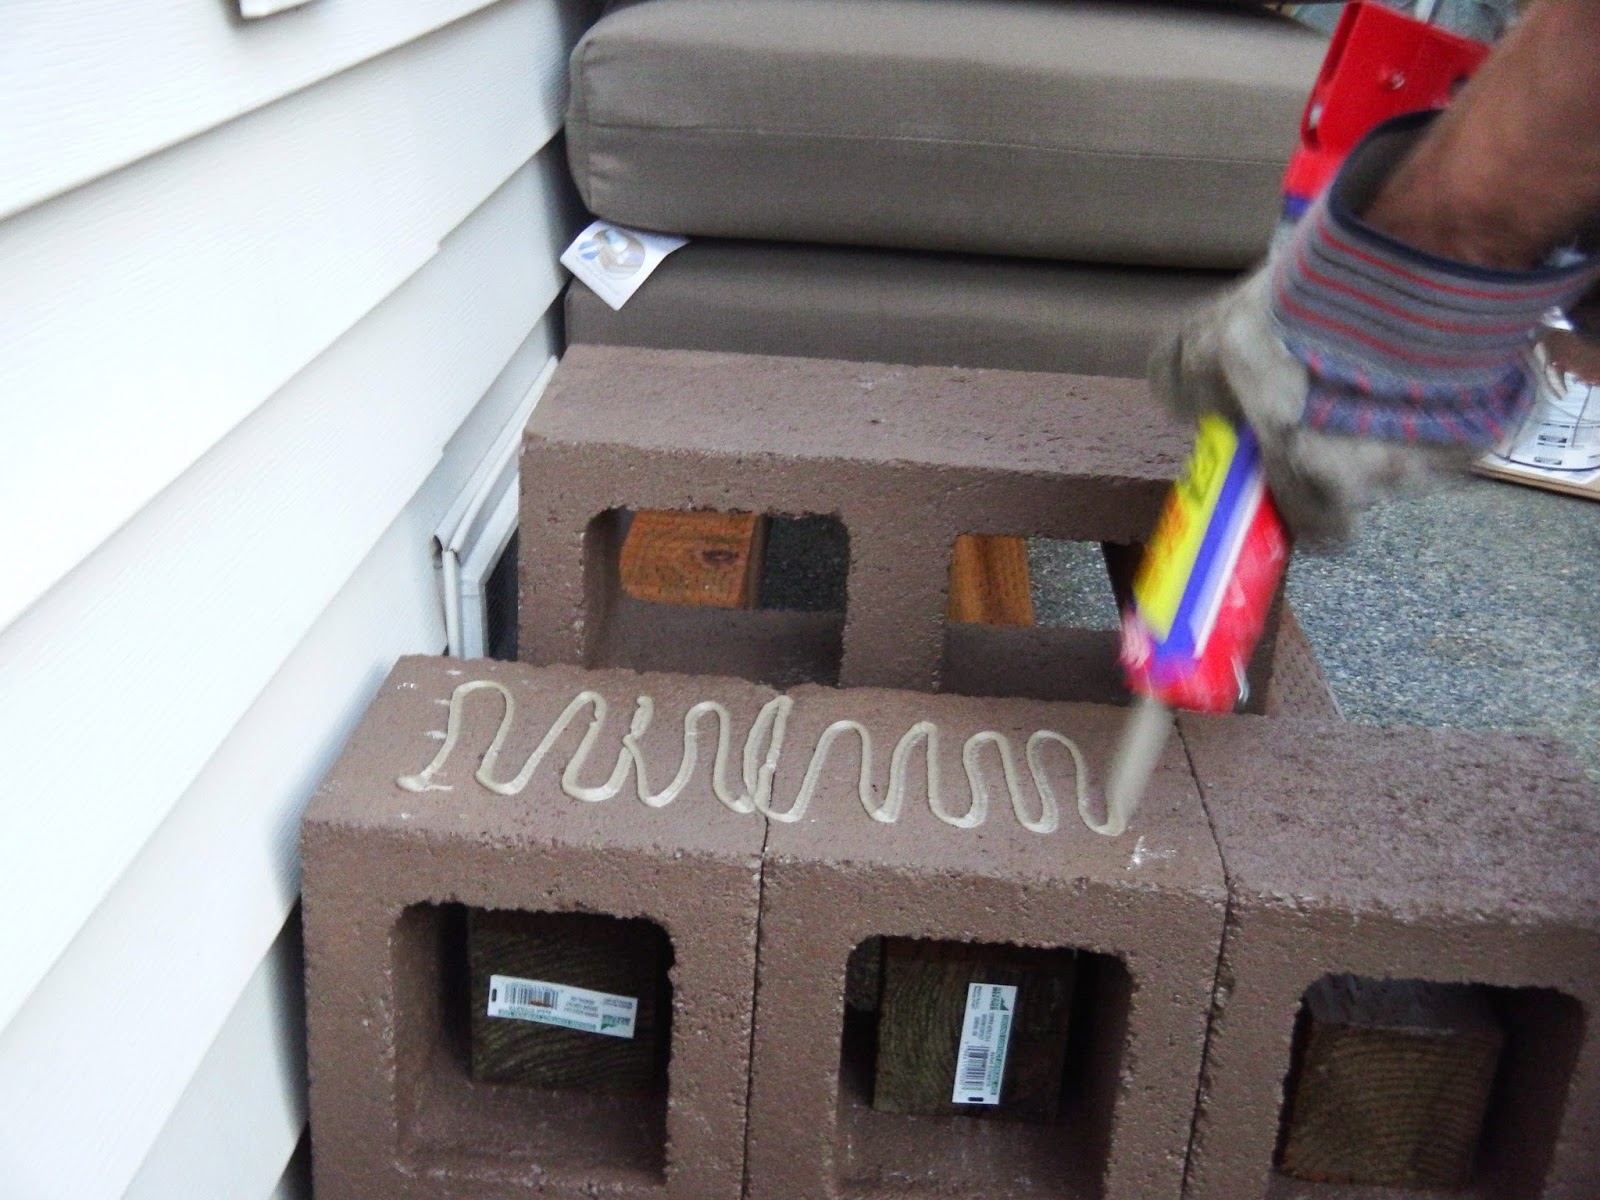
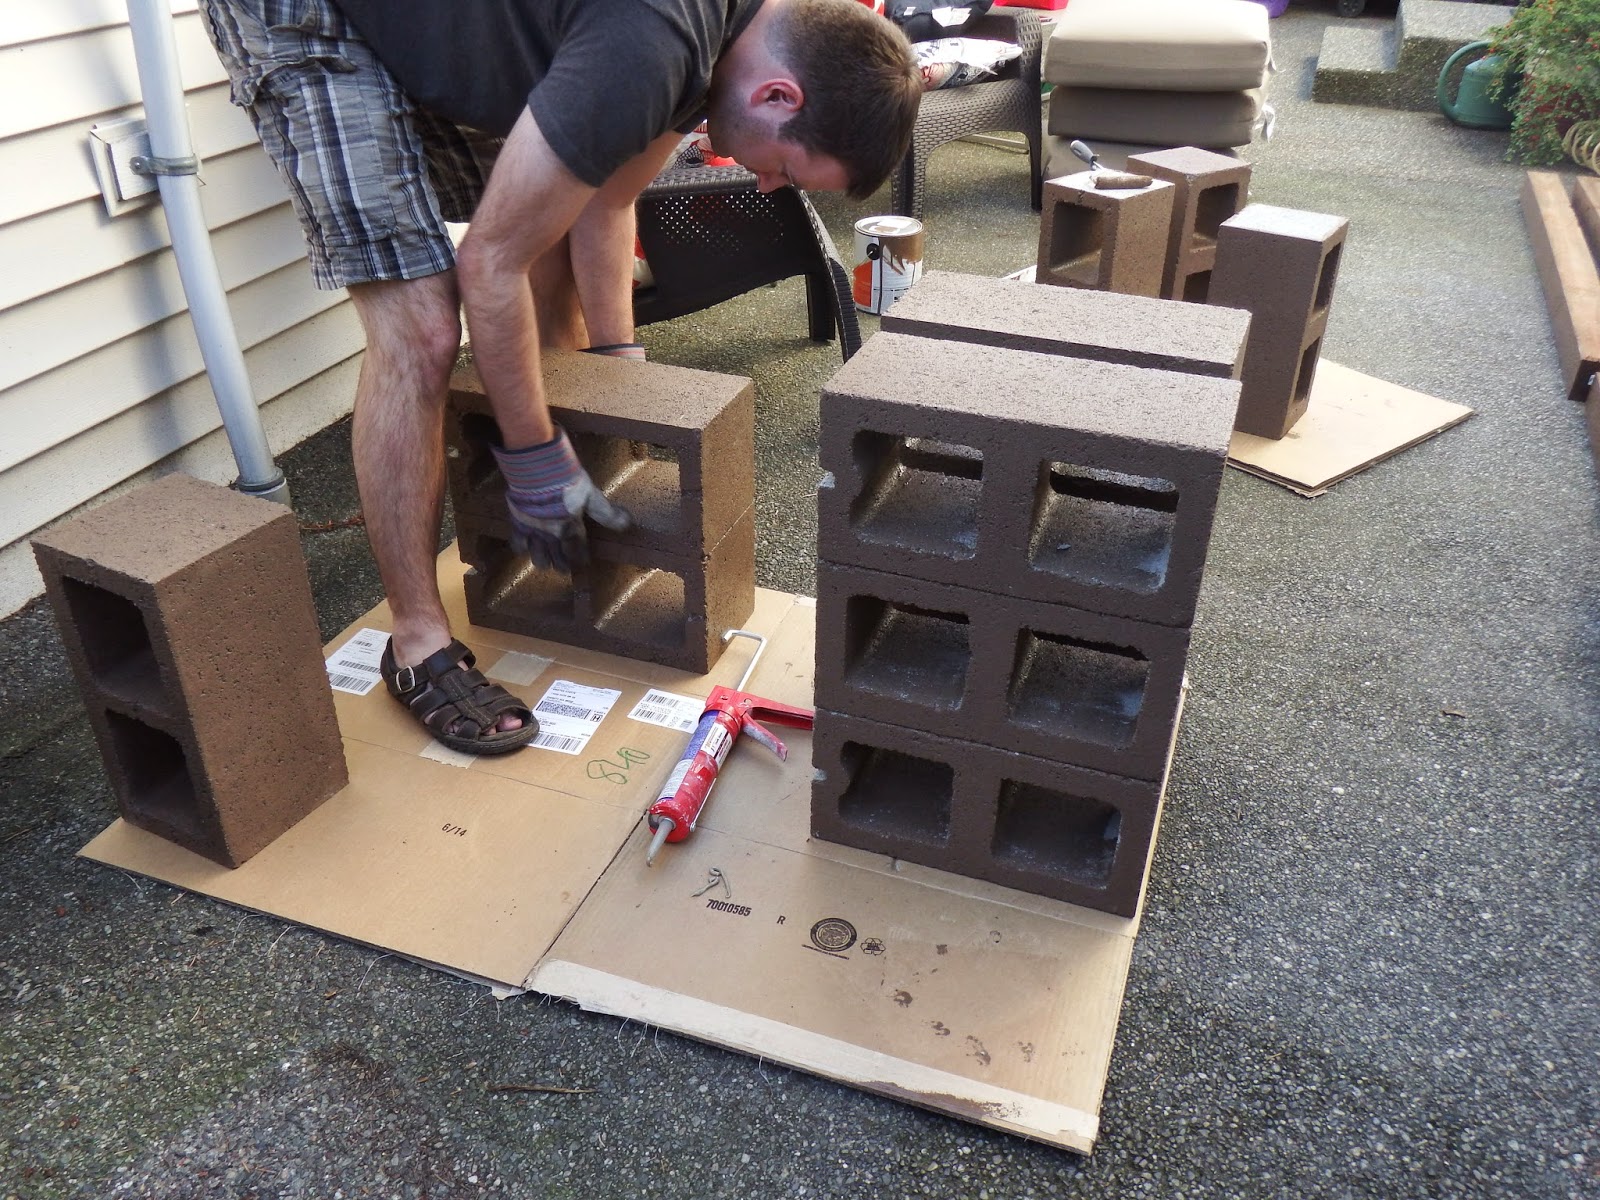
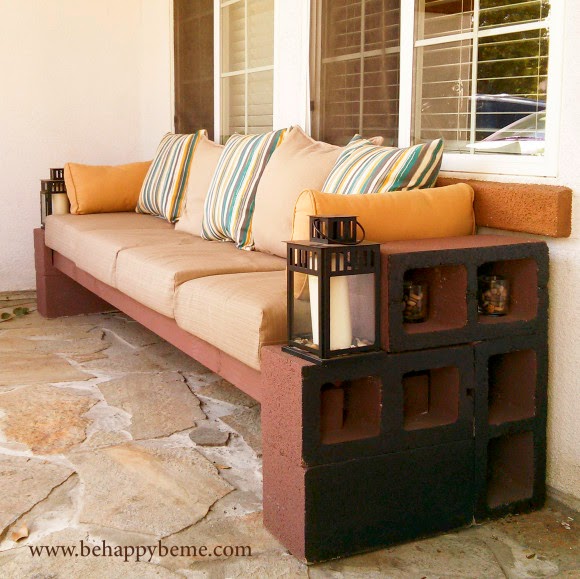
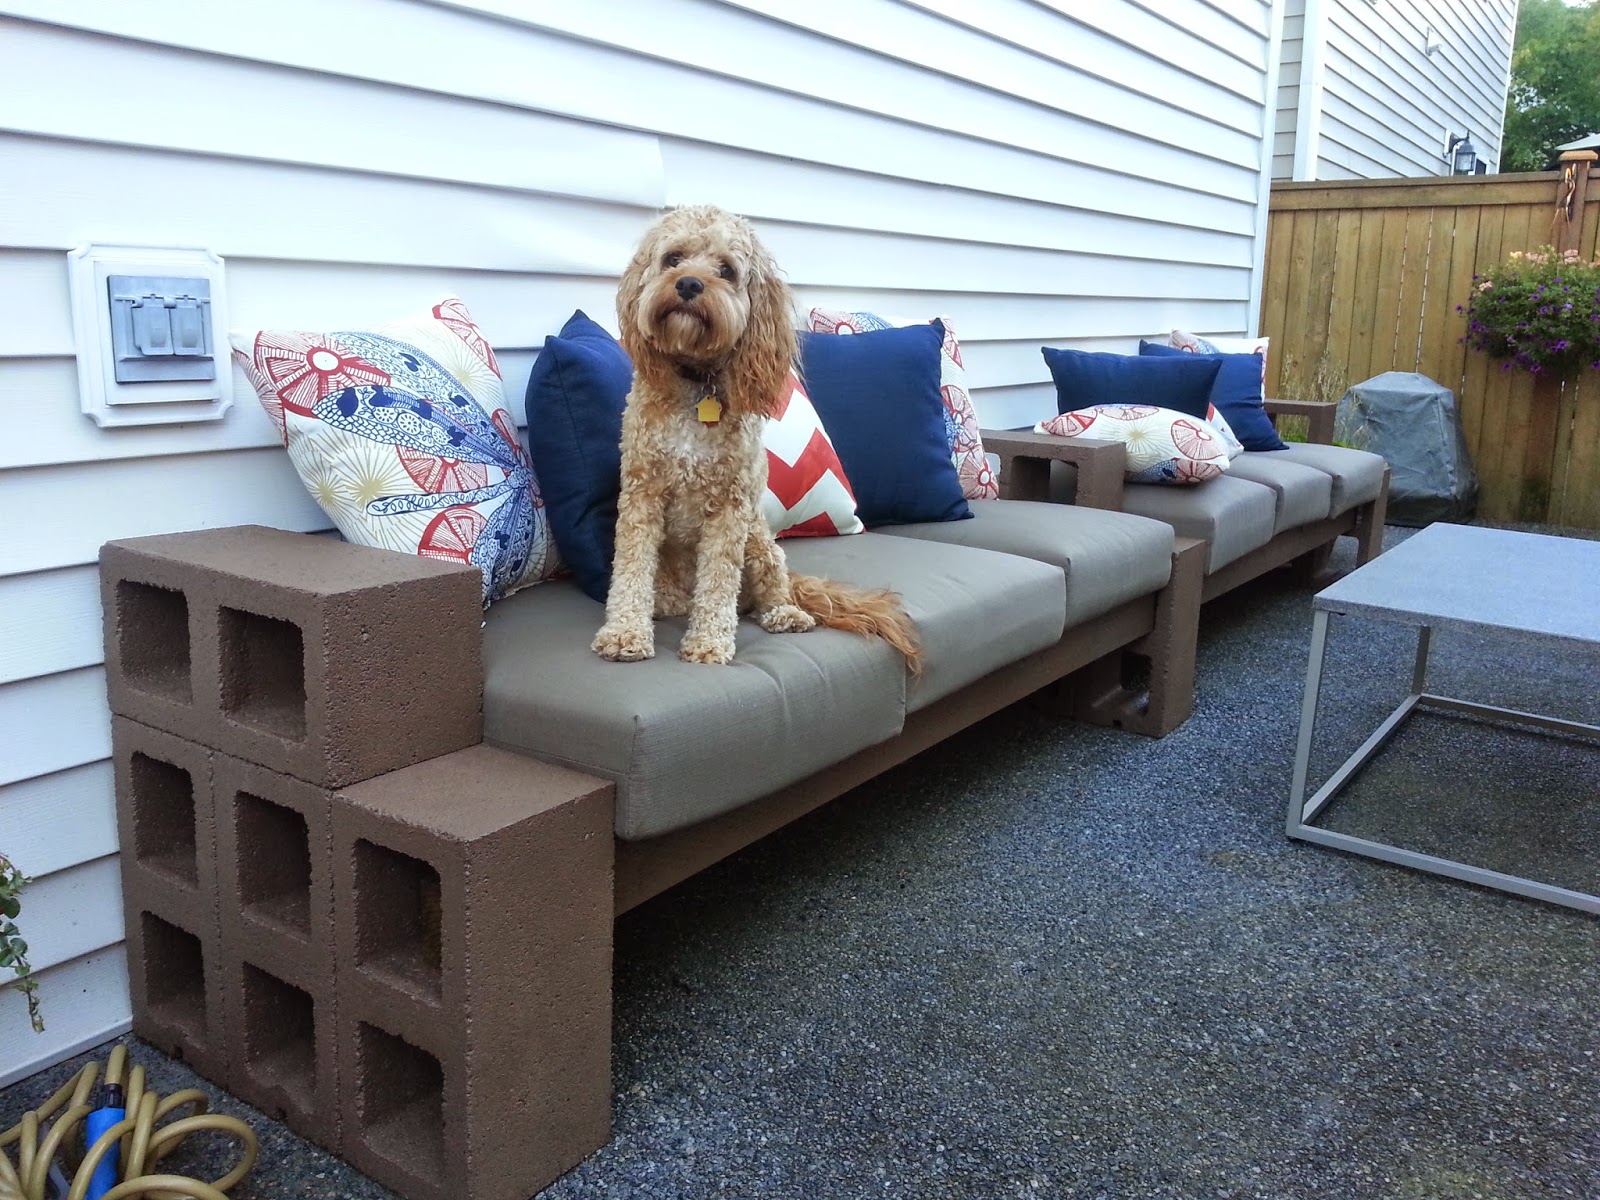
After the blocks are glued together we just slid the 4x4s into the openings and adjusted as needed. Then added the cushions and pillows. Done-zo!


Ruby enjoys the couch too, she's a pretty cute model. :) After getting the couch made and set-up we added a couple chairs on the opposite side and strung some globe lights in between the house and the garage.


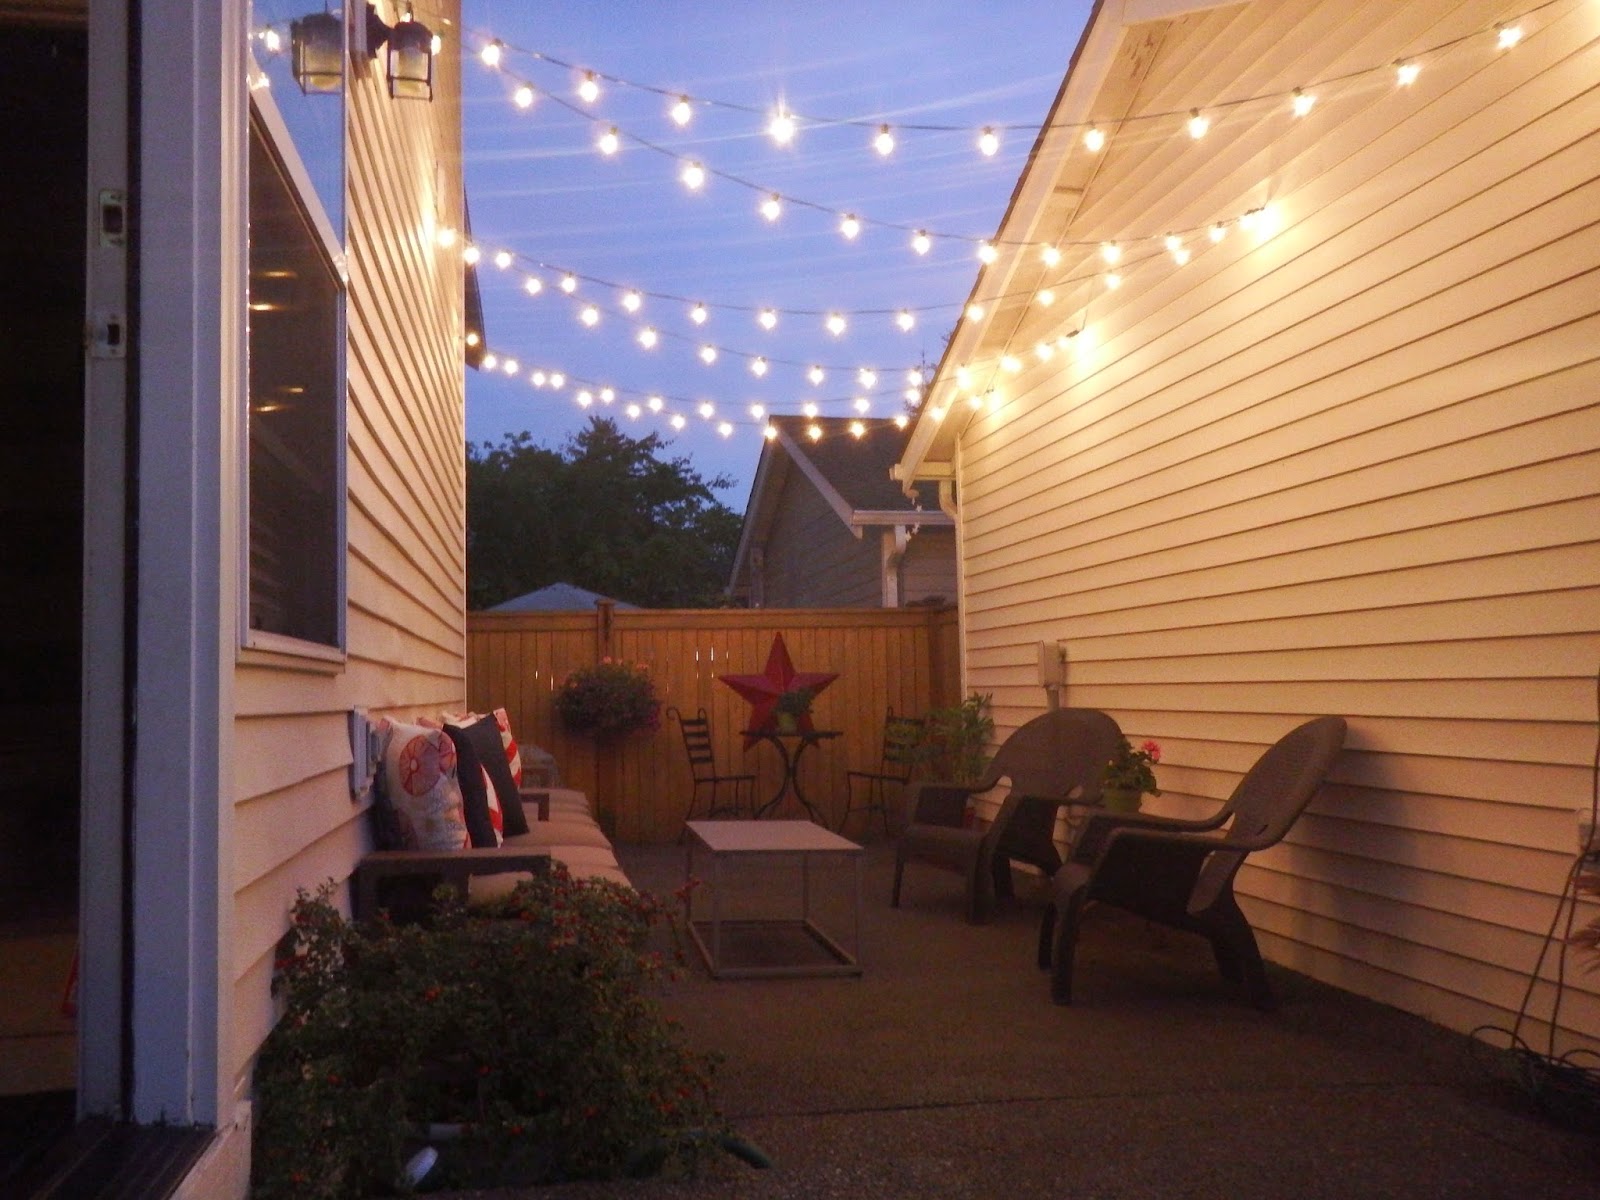
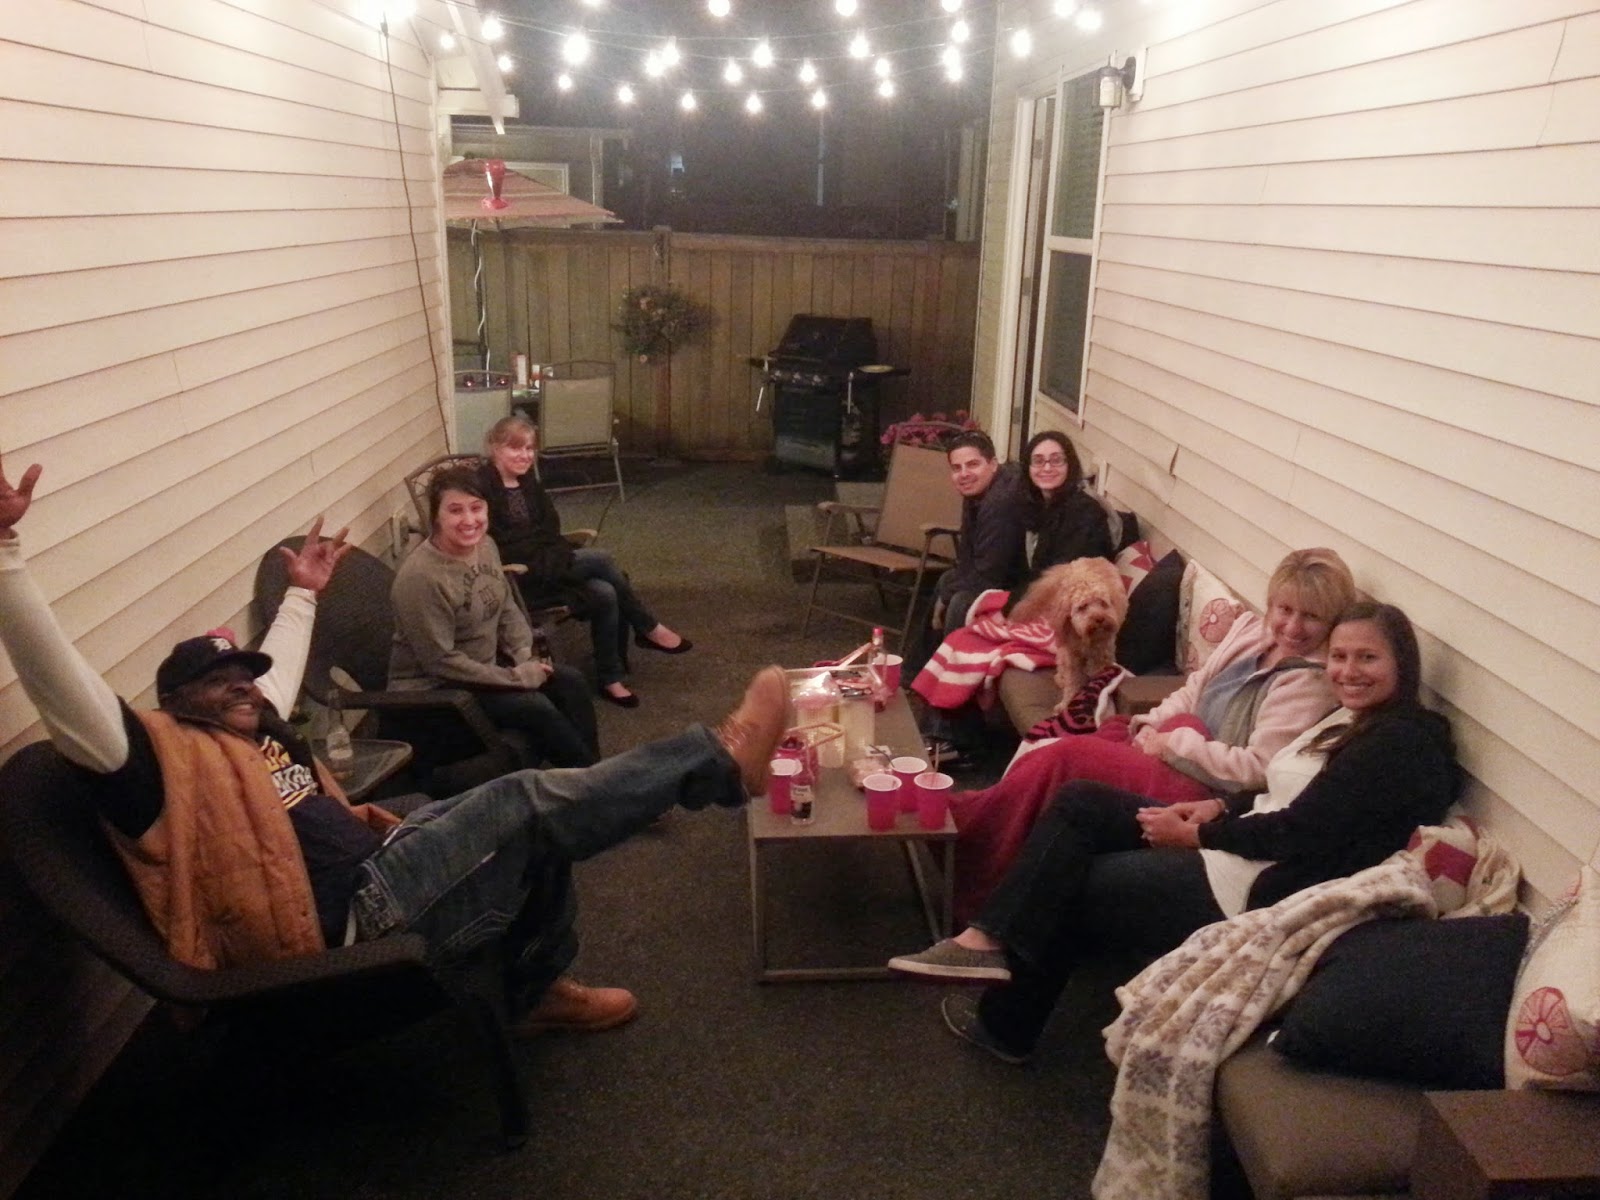
The lights had a nice vibe to the space I think. We managed to have a couple BBQs with friends before the cooler Fall weather arrived and it was really fun to be able to enjoy our outdoor space.


And that's how we made out backyard a little more cute, and a lot more useful. We'd still like to get a couple lumbar pillows and maybe a few more little accessories for the space but it's been a wonderful update for us.

Love, K

Pinterest Challenge - Summertime!

Tuesday, July 10, 2012

It's time for another round of Pinterest Challenge! The Pinterest Challenge is a fun idea created by Katie Bower over at Bower Power and Sherri Petersik at Young House Love to prompt us all to get our booties in gear and start making some of those awesome projects that we "pin" on Pinterest. When the Summer challenge was announced I knew just what I wanted to make...a light for the patio umbrella.


I started the project by spray painting my hula-hoop. I picked up the hula-hoop at Target and used a white spray paint that I already had on hand.


The painting didn't take too long and it helped that it was a nice sunny day so the hoop was quick to dry. I let it dry all day in the sun and then moved it into the garage over night.

The inspiration picture on Pinterest used icicle lights but I knew I wanted to just use a regular strand. I'm a pretty awkward person so I figured if there were lights dangling around over the table I'd find someway to get my hair tangled up in them or something equally lame. No icicles seemed like a safe bet. I picked up this simple strand of lights from Target and wrapped it around the painted hula-hoop. I used a white zip-tie to keep the lights on the hoop (that'll make Loren happy, he LOVES zip-ties).

After the lights were on the only thing left to do was hang it up. These are the supplies that I planned to use:

But it didn't work out as planned. I had planned to use fishing line to create a loop and then hang the hoop from the magnetic hooks, but the magnets just weren't strong enough to hold the weight. I ended up using...more ZIP-TIES! I have to admit, Loren's love of zip-ties is wearing off on me. They're super useful. The zip-ties worked like a charm. My light was in place!


I really can't tell you how much I love this simple little project. It was quick and cheap (that's what she said!), seriously I only spent about $20 bucks. And it looks so sweet at night. We don't really spend a ton of time out on our patio but this light makes me want to. I'm a sucker for some twinkle lights so I'm ready to grab a glass of wine and head on out back! Visitors welcome...byow. :)


So that's my Pinterest Challenge project for this season. Anyone else been inspired by Pinterest lately? It's amazing all the ideas over there!

Back Door Quickie

Wednesday, August 31, 2011

Last summer I a lot of energy sprucing up our backyard, including painting the back door. This year the backyard hasn't been getting as much attention but I did notice that some areas seemed more neglected than others. The wood trim around the door was looking pretty shabby. It had been looking gross for awhile but I just kept ignoring it.


Over the weekend I decided that I couldn't take it anymore. That's not totally true; I was actually feeling extremely lazy but still wanting to accomplish something. This was the easiest something. :) Anyway, I grabbed some sandpaper and a putty knife and got to work. I used the putty knife to scrape off all the loose paint that was chipping off and then filled in any major gaps with wood filler. Once I finished that step I gave all the trim a good sanding. I've been using this little sanding contraption from 3M:


I like it because it keeps the sandpaper from touching my fingers (which I hate) but Loren has used it before and doesn't like it because the handle rotates and it would move when he didn't want it to. That was all a side note to say, I didn't take any pictures after the prep was done. I forgot and just started painting. I just used the leftover paint from when we painted all the outside trim a few years ago. Here's the door all fixed up.


I feel like it's a major improvement. No more eye sore every time we walk in the door. It's not perfect but I did the best I could. Me and sanding/patching aren't the greatest of friends but even Loren gave it his stamp of approval. Always a win in my book! :) Anyone else been painting any trim? Indoors or out? I feel like it's a very annoying task but provides an excellent result.

Yard Spiff

Monday, June 20, 2011

The side of our house that leads to the front yard has been a mess since we moved in. When we had our patio poured out back we fixed up one side of the house but left the other looking like this:
Hot mess. And the worst part of it is that's where you have to drag the lawn mower to get it out front. Plus, it's what I see when I look out the kitchen window. Not cute. Over the weekend we decided to tackle it. And when I say we, I mean Loren. My total help was probably about 4%. But it's because I'm fragile and throw my back out getting laundry out of the dryer. Plus I hate outside work...just being honest.

Anyway, the first thing that had to happen was getting rid of all the weeds and leveling out the ground a bit. There was one corner in particular that really dropped down. Loren decided to build a little wall of sorts to fix that problem. He used some pavers that we already had and some cement glue to hold them in place, then just covered the area with dirt. It seems a little more permanent now instead of just dumping a bunch of dirt over there and hoping it doesn't wash away. Plus, it was free. Win!


Now the ground was pretty much level (or level enough for us and the lawn mower) so it was time to lay the path of pavers. We covered the ground the landscaping fabric to keep weeds out and then laid the pavers in a super simple alternating pattern.


We got them laid down pretty quick. After the paver path was down we filled in the remaining ground area with pea gravel. We have that on the other side of the house so now it sort of matches. And that was it!


I included some pictures with a few of my existing plants just to get an idea of what I want to put along the path. Loren said the ground didn't seem very hearty so I'm just going to go with planters. We'll see what happens. While it's not perfect, we feel like the area is looking a lot better and it will definitely be easier to haul that dang lawn mower out front!

Outdoor update

Thursday, June 9, 2011

I'm back with the another update on our backyard plant situation. A few weeks ago I showed you my freshly painted flower pots but I still had a few more things to tackle in the backyard.

Our hanging basket situation was a real mess. Last year we used the metal and coco liner baskets for our hanging baskets. They were a pain in my rear last year and this spring was even worse. I found these "cut to size" replacement liners and figured things would be great. Surprise! It was horrible! And super itchy to cut. Super duper itchy.

So after I called it quits with that hot mess I decided to get something new. I couldn't find anything I liked in the stores so I ended up purchasing a couple of these:

I bought them from Ace Hardware's website and had them shipped to the store free. And let me tell you, that shipping was quick! There is nothing that makes me happier than online purchases that arrive quickly. Anyway, here's the final product with my million bell flowers all planted.


And here's a quick picture of the last couple pots I painted. They used to have brown bottoms and now the brown is a lovely shade of red.


I'm so happy I painted all the flower pots this spring. I was a little unsure of them at first but now that the plants are all growing up and blooming they look so colorful and fun.


Isn't it amazing what a little spray paint can do? Okay, so that last picture doesn't have anything to do with my spray painting but I wanted to show off our pretty azalea blooms! Anyone else been sprucing up their outdoor space with some spray paint? And I don't mean graffiti...though that might be interesting! :)

Moss be gone

Monday, May 16, 2011

One of the fun things homeowners in the Pacific Northwest get to deal with is this:


Yep. That's a whole bunch of moss on top of our garage. Moss can be pretty and almost magical looking in a pretty outdoor setting but not when it's on your garage. Then it's ugly. And will make you feel angry and worried that you're going to get a nasty gram from your HOA. No one likes that. Loren decided to tackle this little project while I was busy getting my paint on with our flower pots. I don't think he'd say it was difficult just annoying. He used our little putty knife and a brush (that I think used to be a broom head) and got to scraping.


It was slow going but it's done now and looks a million times better. Take that moss!


That's Loren's "I just kicked your butt" pose. I like it. We're planning to spray some anti-moss stuff up onto our shingles but we'd like to stop raining long enough to actually stick to the roof...lameo. Anyone else out there dealing with this sort of thing? It was new to me when we moved to this area. I hope it never returns! :)

Prepping for Spring

Monday, May 9, 2011

I've been staring at our dreary backyard all Winter long. And trust me, it's been a looooooong Winter. Things in our backyard were looking pretty depressing...


I decided that I wanted to things ready for our new plants by sprucing up the pots. Everyone knows that plant pots are expensive, so I've purchased all of ours on clearance. Clearance = not matching. I went a little crazy when picking out the colors to paint the pots. Our house is very neutral so I'm blaming the color craziness on that. This is what I decided on, mid-paint job.

Now that the pots are finished up, I planted some geraniums and our peonies are really growing up nice. I'm digging all the color so far.


I still have a few more pots I'm working on and some hanging baskets to figure out but things are sprucing up nicely. Just a little bit at a time. Anyone else been doing any prep for Spring?

Lock it up!

Wednesday, February 2, 2011

In the time we've lived in our house there's been one major annoyance for Loren...the door to the garage. Our garage isn't attached, is always locked, and we forget our keys inside the house a lot. So, when trying to run out to the garage to grab something quick it got to be a little frustrating to be out in the rain (most of the time) with no key. Enter this -

The Kwikset Electronic Deadbolt. We ordered this bad mamma-jamma about a week ago and it arrived just in time for the weekend. Loren couldn't wait to install it. Here's what we started with; just a regular ol' deadbolt and doorknob lock.


First thing to do is remove the existing deadbolt. Then you line up the keypad and this bracket piece on the back of the door. You have to make sure to feed this cable looking piece through to the back. Once these pieces are screwed in the installation is halfway done!


Then you plug the cable piece into this chip, install the batteries, and screw this piece down.


The last step is just to put the cover on in the back and then make sure the front keypad is straight.

Loren installed it in about 20 minutes and we've been loving it every since! The lock also comes with really easy instructions for programming your personal code. The deadbolt shade of silver is a little off compared to our doorknob but I'm sure I could fix that with some paint...or I might decide not to care since it's the garage! Either way, I'm really happy we installed it. It's much nicer than fumbling around with the key in the rain, plus, I LOVE pushing buttons! Anyone else have an electronic deadbolt? I'm a little obsessed with it now and just want to tell everyone about them!


*First photo is courtesy of Lowes.com and the rest are courtesy of Loren's cell phone. :)
 
template design by Studio Mommy (© copyright 2015)