Pages

Showing posts with label Lighting. Show all posts

How to Install LED Recessed Lights

Wednesday, May 24, 2017

While we've been working on our kitchen it became very obvious that our existing lighting was not going to cut it. We had these fish eye lights which are useful if you want to direct light in a specific direction but a bit unusual in the kitchen. Also...ours were filthy. An electrician was over to do some different work and mentioned that I could replace the fish eye lights with these LED recessed lights. I hadn't heard of such a thing but took a peek next time Loren and I were at Lowe's. Take a look (link here)...


The nice guy at Lowe's gave me a quick run down on how to swap out the lights and then Loren gave me some step by step instructions. BUT! I swapped them all out on my own! I feel pretty accomplished about it, but it truly is super easy.

First things first, turn the breaker off for the area you're working on. Then take out all the existing lightbulbs. Now you're ready to actually switch the light fixtures.

Next step is to remove the old light. For our lights I just had to get a grip on the trim of the existing fixture and then tug on it a bit. It can feel like you're pulling on the lights too hard but they're just held in place by some metal spring type things. Once you're done it should look like this.


Up next, take the portion of the new retrofit lights that looks like the bottom of a light bulb and then screw it into the socket.


Now all you have to do is tuck the socket and wires up into the opening in the ceiling. Once everything is in place, push the light into the housing. Again, there are friction clips that hold the light into place so just push it into place and make sure it's snug and not moving around.


That's it! Once you get all the lights in place, you can turn the breaker back on and admire your handy work.


I love how the lighting looks in the kitchen now. And since the new lights are LED we shouldn't have to change them while we're still living here. :) Being so close to the ceiling did make me realize that it probably needs to be painted sooner rather than later...that's thrilling news. If you're in the market for some updated recessed lights I'd encourage you to check these out, and let me know!

Hope you liked this little tutorial today! Enjoy the rest of the week friends!

Love,
K

Under Cabinet Lighting

Wednesday, January 22, 2014

I've always been interested in adding under cabinet lighting to our kitchen cabinets. I think it looks nice, and with our floor plan I thought it would be nice to add a little more light without having to just leave on the kitchen lights...too harsh for night time movie watching. :) The trouble with under cabinet lighting though, is it's expensive. I'd seen several different options or kits but they were all in the $100 range and I just wasn't interested in spending that much. Enter Ikea. I was there browsing one day and came across this:


The best part? This light set was $30! I knew it would take a little bit more effort to set up since it wasn't meant for cabinets but I thought it was worth a try for the price.

The lights are actually pretty cool. You can customize how you connect them which allows you to fit them to your designated area (a gal I encountered at the store actually used the lights behind her TV). There are these connector pieces that you use to lengthen your row of lights and then they all hook to this hub looking thing for power. (Sorry about the pictures, Loren actually did most of the work while I was gone one day but was sweet enough to snap some cell phone pics for me to share)


We laid out the lights on the counter before attaching them to the cabinets just so we could mess with the sizing without having to remove the adhesive every time. The actual installation is really simple, there's little sticky pads on the back of the lights so you just peel and stick. The cords were a bit trickier. I ended up slicing some 3M strips to match the width of the cords and using that. At first I just used a few pieces and after awhile the cords started to sag, but I added more so basically the entire cord was supported by 3M strip and it seems to be holding up well. There's a few strategically placed thumb tacks keeping the cords in place too.


You like those blue paint leftovers?! The kitchen was a lovely baby blue color when we moved in so I don't know when that bright primary blue color was used. Anyway, this is the hub that you connect all the light stick pieces into for power. I think I mentioned before that there are extension pieces in the light set so it's pretty easy in a relatively small space to get all your lights connected.


The hub (as I call it) attaches to the power cord, and to power the lights our wonky cupboards actually came in handy. Since we don't have an actual corner cabinet, there's open space in that area. So we just plugged the lights in at the nearest outlet and tucked the switch up into the cupboard. Yeah, we have to open the cabinet door to turn the lights on and off but it's really not that big of a deal for us. Especially considering how much money we saved using this little cheapo set.


I love the nice glow it adds to the kitchen. At night when we're in the living room area we can just leave the under cabinet lights and sink light on and it's perfect.


Does anyone else have cabinet lighting? I love it and wish we would've installed it years ago! Let me know what you think in the comments! xoxo, K

Swing lamps for everyone!

Tuesday, September 17, 2013

Ahh, the never ending master bedroom makeover. I have to say, I'm pretty sick of thinking about the master bedroom. I've been working on it for over a year but just get distracted so easily! I think we're finally in the home stretch though of making it feel more personalized and cozy instead of bare walls and random accessories sitting everywhere. (You can check out the previous updates here, here, here, and here).

The most recent update is new nightstand lamps. When we replaced the nightstands, it quickly became obvious that the surface space was pretty small. I decided that switching out our existing (and non-coordinating) lamps for some swing-arm lamps would be just the solution we needed. Luckily, Loren agreed. :) What neither of us could agree on was the high price of swing-arm lamps! Once I knew that was the direction we wanted to go, and I started shopping, I couldn't believe how expensive they were! I thought I'd found the best price possible on Amazon but it still would've been about $160 total which made me hesitant to complete the purchase. I stalled long enough that I was able to find a winning lamp at Home Depot. For $35! Wahoo!!


The lamp itself requires a little bit of assembly. I'm not going to lie, Loren did all the work installing these lights. But he said that it's easy, just screw the visible wall plate to the portion that actually screws into the wall, and then connect the cord covers together. We don't have any pictures because he was working by himself in a hurry before company arrived! Nothing like a visitor to get our booties in gear! 

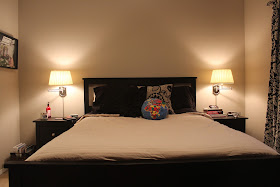
Here's the lamps all set up! We're loving them so far! They're great for allowing extra space on the nightstand and Loren loves that he can pull the light closer to him.


 Our nightstands still need a little styling, but Loren is definitely more into function rather than decor. I guess I'd like a mix of both. But this is where we are now, reading in a whole new light. :) Operation bedroom makeover is finally approaching the finish line. What do you think of the new lamps? Anyone else a fan of the swing-arm lamp?

Overhead Lighting Upgrade

Monday, March 18, 2013

A couple years ago I updated the light above our kitchen sink to have a pendant light, rather than the recessed light that had been there since we moved in. We've been digging the nice glow from the pendant light every since then.

But yesterday we made a trip to Lowe's for something completely unrelated to light fixtures but I happened to come across this little guy.


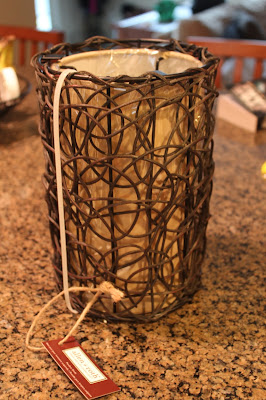
What's sort of funny about it, is that on the shelf at Lowe's it was right next to our existing pendant shade which made it all that much easier for me to decide to take home the new shade. I realized that our current cover had a lot of gold/yellow tones to it and I didn't really care for that. And I really loved the nice texture that this other pendant cover had. So for just for $20 I brought it home.

The installation was super easy but did take both hands so I don't have any pictures. It was just remove light bulb, unscrew old pendant, screw on new pendant, and replace the light bulb. Lots of lefty-loosey, righty-tighty. Here's the new cover shining bright:


And a quick before and after:


I'm loving the new cover!! Usually I have something that still irks me when I switch things out but this time I just love it, and feel like it's such an improvement over the last cover. It's so nice when you can be happy with a quick and easy update! Let me know what you think in the comments below!

Pinterest Challenge - Summertime!

Tuesday, July 10, 2012

It's time for another round of Pinterest Challenge! The Pinterest Challenge is a fun idea created by Katie Bower over at Bower Power and Sherri Petersik at Young House Love to prompt us all to get our booties in gear and start making some of those awesome projects that we "pin" on Pinterest. When the Summer challenge was announced I knew just what I wanted to make...a light for the patio umbrella.


I started the project by spray painting my hula-hoop. I picked up the hula-hoop at Target and used a white spray paint that I already had on hand.


The painting didn't take too long and it helped that it was a nice sunny day so the hoop was quick to dry. I let it dry all day in the sun and then moved it into the garage over night.

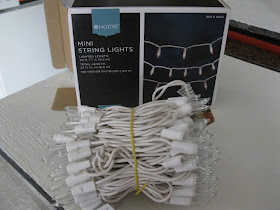
The inspiration picture on Pinterest used icicle lights but I knew I wanted to just use a regular strand. I'm a pretty awkward person so I figured if there were lights dangling around over the table I'd find someway to get my hair tangled up in them or something equally lame. No icicles seemed like a safe bet. I picked up this simple strand of lights from Target and wrapped it around the painted hula-hoop. I used a white zip-tie to keep the lights on the hoop (that'll make Loren happy, he LOVES zip-ties).

After the lights were on the only thing left to do was hang it up. These are the supplies that I planned to use:

But it didn't work out as planned. I had planned to use fishing line to create a loop and then hang the hoop from the magnetic hooks, but the magnets just weren't strong enough to hold the weight. I ended up using...more ZIP-TIES! I have to admit, Loren's love of zip-ties is wearing off on me. They're super useful. The zip-ties worked like a charm. My light was in place!


I really can't tell you how much I love this simple little project. It was quick and cheap (that's what she said!), seriously I only spent about $20 bucks. And it looks so sweet at night. We don't really spend a ton of time out on our patio but this light makes me want to. I'm a sucker for some twinkle lights so I'm ready to grab a glass of wine and head on out back! Visitors welcome...byow. :)


So that's my Pinterest Challenge project for this season. Anyone else been inspired by Pinterest lately? It's amazing all the ideas over there!

Red Light Special

Thursday, August 25, 2011

I mentioned earlier in the week that I had scored some lovely priced, highly ugly lamps at Goodwill; now I'm back to show you what they look like post makeover. Just for a reminder, here's what I was working with:


Pretty, huh?! And to add to the supreme beauty of these lamps they both had a big, old sticker on the sides.


The sticky came off pretty easy. I tried to just scrub it off using Goo-Gone but that wasn't cutting it. So I saturated the area with Goo-Gone and then scraped it off. I might have used a butter knife to scrap it. The knife did the trick and I was left with a nice, smooth surface.


I got the lamps all prepped for painting out in the garage. I covered the cord and light bulb spot with aluminum foil. I can't remember where I originally saw this aluminum foil idea but it works really well. It was a lot easier to bend into all the little nooks and crannies than painter's tape would have been (easier to remove too). To allow me to reach the entire finial I set them on screws that were poked through an old canvas.


Once I was all prepped, I busted out my trusty ol' Rustoleum spray paint in Crimson Red. It took a little over one can and four coats of paint to cover the surface nice and even. I probably could have saved a coat or two by priming the lamps first but that didn't occur to me until I'd already started painting. Whoopsie. I am terrible at remembering to prime things. Someday I'll learn. And, paint might have gone over the edge of the drop cloth. Loren's thrilled. Another whoopsie! :)


I bought a couple lamp shades from Lowe's but they ended up being WAY too big so I returned them. Worked out for the best. I had two different lamp shades sitting around the house that I could try.


I ended up going with the warmer toned one that also has a subtle floral print on the shade (the picture on the right). I'm not convinced it's the best fit ever but it'll be fine until I find a better option. Just look how cozy these lamps make the guest room look:


So nice! I hope our guests enjoy being able to cozy up with a book before nodding off and NOT having to get up to turn the light off. That's the story of the Goodwill lamps. The total cost was around $20: $6 for the lamps and $14 for the spray paint (but I still have some leftover). Not too shabby for twenty-bucks huh?! Anyone else been working on lighting projects? Or maybe just spray painting everything in sight?! :)

This Little Light of Mine

Thursday, July 28, 2011

For the four and a half years that we've lived in this house I have hated the lack of overhead lighting in our master bedroom. It was so dark in there which would really drive me batty when I was trying to pack a suitcase.


The past few months we finally got our booties in gear and started calling some electricians. During this process I've learned that electricians are a tricky bunch. You can call them, make appointments with them, and they'll just blow you off. Nice huh?! Just when I was about to lose my mind completely my sweet Loren got a recommendation from a coworker. And the best part about it was that the recommender does his research so we knew this electrician was legit. Yay for not burning the house down! AND he answered his phone. AND showed up to our house ON TIME! After he worked his magic we were left with a fancy new lightswitch (okay, it's not fancy just has two switches) and this lovely little box in the ceiling.


Pretty huh?! He did such a good job and was a tidy little worker too. Now it was hubby's turn to get to work. We've had the light fixture since uhh, February maybe? Loren installed it pretty quick and then it was showtime! Let there be light!!


Yay!! I'm so super jazzed about having this light in our room. It makes such a difference. I actually wanted to pack a bag today just for fun. Then I remembered that I'd just unpacked a bag (more on that another day). Oh well, point is...I can see everything very clearly now. And I like it.

Anyone else been working on a lighting project? Or living in a dark, dreary dungeon room for four years?! :) Tell me all about it!

Table Lamp Success!

Monday, September 27, 2010

You might remember my heartbreak during the summer over a pair of gorgeous table lamps from T.J.Maxx, every since I've been on the hunt for a pair of lamps for the living room. The problem was that every time I found something I liked the price tag scared me away. Finally I decided that it was time to take matters into my own hands...

Here's a picture of the inspiration lamp from T.J's:


Last week I found these gems at Goodwill.


Pretty huh?! But I was hoping that a nice coat of spray paint would turn them into something lovely so that's where I started. I washed them up and then got the spray paint out. I decided to use Rust-oleum All-Surface Paint (shocking, I know!) in gloss black. I sprayed the lamps with several light coats of paint and then left them in the garage to dry.


While the lamp bases were drying I went inside to work on the lamp shades. I had purchased some basic lamp shades from Lowe's and then grabbed some black ribbon from JoAnn's. I decided to use hot glue to adhere the ribbon. It worked great for me but I'm sure there are a lot of different ways you could do it. I just lined the ribbon around the top and bottom, following the edge of the shade and glued a small section at a time.


Really that was it. I did find a run in my paint so I sanded that little spot and painted another coat but hopefully that won't be necessary if you decide to try it! I had also purchased some black finials from Lowe's as well. I assembled the lamps and loved the result!


And here they are in the living room in all their glowing beauty!


What do you think? I feel like it was a success! Has anyone else been spray painting things beautiful lately?
 
template design by Studio Mommy (© copyright 2015)