Showing posts with label Spray Paint. Show all posts

The Longest Project Ever

Monday, December 3, 2012

This was truly the longest project I've ever worked on for our home. It started earlier this year when I decided to make some wall art for the guest bedroom. I had seen a few projects on Pinterest that involved using a doormat as a stencil so I thought I'd give that a whirl. I picked up my supplies at Lowe's (a rubber doormat, white spray paint, and the wood boards) and got to work. I started by spray painting the boards with some oil-rubbed bronze spray that I already had on hand.


After that paint was dry, I put the doormat down and sprayed the white paint over top.


I think this where things went downhill. The doormat was much bigger than our wood pieces so it didn't create a good border and the white paint got underneath the mat. The lines were all fuzzy and in general, the look just didn't turn out as I had hoped it would.


Since plan A didn't work out, it was time to think about plan B. After pouting and thinking about it for awhile (and by awhile, I'd say it was about six months) I decided to try using an actually stencil. I repainted the all the boards a nice clean white and then got the stencil out. I just picked up the stencil at Michael's, it's nothing fancy or special ordered.


After the stencil was taped in place, I started painting. I used three different colors of cheapie acrylic craft paint and used a foam "brush". I don't seem to have a picture of the tool I used but it was more of a "dabber". It helped keep the paint from seeping under the circles on the stencil. I adjusted the stencil on each of the boards so all three are slightly different.


Once the painting was done I wrapped the edges in a brown satin ribbon using my hot glue gun (a little trick I learned from my sister-in-law). Then I was finally done, and it was time to hang them up.


So that's the end of the journey with this little project. I'm still undecided on if I really love them or not, but they're working for now and helping take some of the echo out of the guest bedroom. We'll see how long they stay. :) Anyone else been working on a super long drawn out project? I hope I'm not the only one!

Pinterest Challenge - Fall Edition!

Tuesday, October 30, 2012

It's Pinterest Challenge time! Yay! Nothing like a challenge to get your blogging booty in gear. If you haven't heard of the Pinterest Challenge it's a fun little virtual challenge that's the brain child of Katie Bower of Bower Power and Sherri Petersik from Young House Love. Every season they challenge people to stop pinning, and start doing and get a couple other bloggers to participate with them, this time Sarah from Ugly Duckling House and Carmel from Our Fifth House are playing along. It's a fun way to get people moving! And it's lots of fun to see all the projects people share.


I worked on a couple Fall themed projects from Pinterest but really this pumpkin tower is the only one that worked out well enough to be worth talking about. I still struggling with a yarn mess from another project! :) I saw a couple cute pumpkin towers on Pinterest that I liked:


Source: www.bhg.com via Kristen @ LoveK on Pinterest

The "welcome" version seemed too big for our porch, as well as being too large to store easily. And I wanted to be able to display the pumpkins for the entire Fall season instead of it being Halloween specific so I decided to modify the smaller of the two towers to meet my needs. I'll be honest, this wasn't the cheapest project ever. I think it was around $50 total but I figure since it's something I can use for years to come it's not so bad. I got the pumpkins and leaves at Michael's and the rest of the supplies from Hobby Lobby.

First thing, was painting the terracotta pot that I used as the base of the tower. I just used a high gloss black spray paint. It took several coats to completely cover the orange but that's no biggy.  I used the styrofoam pieces to create a base for the pumpkins to stick to.I just hot glued the pieces together. I decided not to glue the foam to the pot, no real reason I just decided against it. I did shove some plastic bags around the base just to keep the foam stable in the pot. I don't have a picture because it was impossible to see anything other than the top layer of styrofoam.


 The hot gluing continued with the pumpkins. I cut the stems off the bottom two pumpkins and just hot glued them on top of each other.


Then I just put lots and lots of hot glue on the bottom of the pumpkins and stuck the whole thing to the styrofoam.


 After the pumpkins were glued into place, it was time to add some leaves around the base. This is a random note, but these leaves I bought from Michael's smell horrible. I can't even describe the smell but gosh, they were gross. Anyway, I snipped the leaves off into smaller little pieces and just hot glued them around the base of the pumpkins. They covered up the styrofoam that was showing and added a little fluff to the tower.


I placed the tower out on our front porch in place of the plant that was dying, and I think it looks really cute out there!

I love that the porch is decorated for Fall but I won't have to do any decoration switching when Halloween was over. These decorations can take us through Thanksgiving! That's a win in my book! :) Overall this was an easy project to complete. I hope you like it! Make sure you check out the other Pinterest Challenge projects that are linked up on Bower Power, Young House Love, The Ugly Duckling House, and Our Fifth House

Pinterest Challenge - Summertime!

Tuesday, July 10, 2012

It's time for another round of Pinterest Challenge! The Pinterest Challenge is a fun idea created by Katie Bower over at Bower Power and Sherri Petersik at Young House Love to prompt us all to get our booties in gear and start making some of those awesome projects that we "pin" on Pinterest. When the Summer challenge was announced I knew just what I wanted to make...a light for the patio umbrella.


I started the project by spray painting my hula-hoop. I picked up the hula-hoop at Target and used a white spray paint that I already had on hand.


The painting didn't take too long and it helped that it was a nice sunny day so the hoop was quick to dry. I let it dry all day in the sun and then moved it into the garage over night.

The inspiration picture on Pinterest used icicle lights but I knew I wanted to just use a regular strand. I'm a pretty awkward person so I figured if there were lights dangling around over the table I'd find someway to get my hair tangled up in them or something equally lame. No icicles seemed like a safe bet. I picked up this simple strand of lights from Target and wrapped it around the painted hula-hoop. I used a white zip-tie to keep the lights on the hoop (that'll make Loren happy, he LOVES zip-ties).

After the lights were on the only thing left to do was hang it up. These are the supplies that I planned to use:

But it didn't work out as planned. I had planned to use fishing line to create a loop and then hang the hoop from the magnetic hooks, but the magnets just weren't strong enough to hold the weight. I ended up using...more ZIP-TIES! I have to admit, Loren's love of zip-ties is wearing off on me. They're super useful. The zip-ties worked like a charm. My light was in place!


I really can't tell you how much I love this simple little project. It was quick and cheap (that's what she said!), seriously I only spent about $20 bucks. And it looks so sweet at night. We don't really spend a ton of time out on our patio but this light makes me want to. I'm a sucker for some twinkle lights so I'm ready to grab a glass of wine and head on out back! Visitors welcome...byow. :)


So that's my Pinterest Challenge project for this season. Anyone else been inspired by Pinterest lately? It's amazing all the ideas over there!

Bronzed

Monday, September 19, 2011

The other day I noticed that our paper towel holder was looking pretty ugly. I mean, not that I've ever seen a pretty paper towel holder but ours was looking extra ugly. It dawned on me it was because it stuck out so much in our kitchen.


Everything else is darker and the light wood tone just wasn't working for me...seemed like the perfect occasion to try out some oil-rubbed bronze spray paint. I've heard lots of good things about ORB so I was pretty excited to give it a try. I chose the Rust-oleum Universal Paint & Primer in One.


I got everything setup in the garage to start spraying. I had to rig the post that the towels go on from the ceiling. I couldn't figure out how to get the spray paint on all the surfaces at the same time other than hanging it. I was pretty impressed with my zip-tie skills. Haha! It worked like a charm though; I was able to get nice even coats on all sides and leave it hanging to dry.


Here's the finished product back in the kitchen. Great improvement I think! It's obviously not the most exciting thing in the world...since it holds paper towels but it looks a lot better!


I do really love the finish though. It's amazing how bronze it actually looks since it's just a spray paint. I sort of want to spray everything I see with it. Anyone else been on an ORB kick lately? If you have the urge I'd totally recommend this paint. Let me here about your projects in the comments.

Red Light Special

Thursday, August 25, 2011

I mentioned earlier in the week that I had scored some lovely priced, highly ugly lamps at Goodwill; now I'm back to show you what they look like post makeover. Just for a reminder, here's what I was working with:


Pretty, huh?! And to add to the supreme beauty of these lamps they both had a big, old sticker on the sides.


The sticky came off pretty easy. I tried to just scrub it off using Goo-Gone but that wasn't cutting it. So I saturated the area with Goo-Gone and then scraped it off. I might have used a butter knife to scrap it. The knife did the trick and I was left with a nice, smooth surface.


I got the lamps all prepped for painting out in the garage. I covered the cord and light bulb spot with aluminum foil. I can't remember where I originally saw this aluminum foil idea but it works really well. It was a lot easier to bend into all the little nooks and crannies than painter's tape would have been (easier to remove too). To allow me to reach the entire finial I set them on screws that were poked through an old canvas.


Once I was all prepped, I busted out my trusty ol' Rustoleum spray paint in Crimson Red. It took a little over one can and four coats of paint to cover the surface nice and even. I probably could have saved a coat or two by priming the lamps first but that didn't occur to me until I'd already started painting. Whoopsie. I am terrible at remembering to prime things. Someday I'll learn. And, paint might have gone over the edge of the drop cloth. Loren's thrilled. Another whoopsie! :)


I bought a couple lamp shades from Lowe's but they ended up being WAY too big so I returned them. Worked out for the best. I had two different lamp shades sitting around the house that I could try.


I ended up going with the warmer toned one that also has a subtle floral print on the shade (the picture on the right). I'm not convinced it's the best fit ever but it'll be fine until I find a better option. Just look how cozy these lamps make the guest room look:


So nice! I hope our guests enjoy being able to cozy up with a book before nodding off and NOT having to get up to turn the light off. That's the story of the Goodwill lamps. The total cost was around $20: $6 for the lamps and $14 for the spray paint (but I still have some leftover). Not too shabby for twenty-bucks huh?! Anyone else been working on lighting projects? Or maybe just spray painting everything in sight?! :)

Outdoor update

Thursday, June 9, 2011

I'm back with the another update on our backyard plant situation. A few weeks ago I showed you my freshly painted flower pots but I still had a few more things to tackle in the backyard.

Our hanging basket situation was a real mess. Last year we used the metal and coco liner baskets for our hanging baskets. They were a pain in my rear last year and this spring was even worse. I found these "cut to size" replacement liners and figured things would be great. Surprise! It was horrible! And super itchy to cut. Super duper itchy.

So after I called it quits with that hot mess I decided to get something new. I couldn't find anything I liked in the stores so I ended up purchasing a couple of these:

I bought them from Ace Hardware's website and had them shipped to the store free. And let me tell you, that shipping was quick! There is nothing that makes me happier than online purchases that arrive quickly. Anyway, here's the final product with my million bell flowers all planted.


And here's a quick picture of the last couple pots I painted. They used to have brown bottoms and now the brown is a lovely shade of red.


I'm so happy I painted all the flower pots this spring. I was a little unsure of them at first but now that the plants are all growing up and blooming they look so colorful and fun.


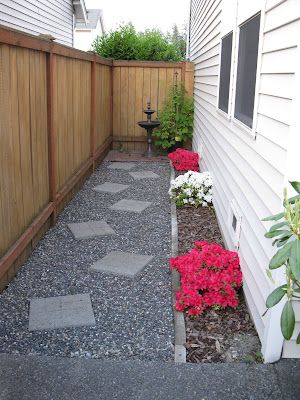
Isn't it amazing what a little spray paint can do? Okay, so that last picture doesn't have anything to do with my spray painting but I wanted to show off our pretty azalea blooms! Anyone else been sprucing up their outdoor space with some spray paint? And I don't mean graffiti...though that might be interesting! :)

 
template design by Studio Mommy (© copyright 2015)