Showing posts with label Home Improvement. Show all posts

How to Install LED Recessed Lights

Wednesday, May 24, 2017

While we've been working on our kitchen it became very obvious that our existing lighting was not going to cut it. We had these fish eye lights which are useful if you want to direct light in a specific direction but a bit unusual in the kitchen. Also...ours were filthy. An electrician was over to do some different work and mentioned that I could replace the fish eye lights with these LED recessed lights. I hadn't heard of such a thing but took a peek next time Loren and I were at Lowe's. Take a look (link here)...


The nice guy at Lowe's gave me a quick run down on how to swap out the lights and then Loren gave me some step by step instructions. BUT! I swapped them all out on my own! I feel pretty accomplished about it, but it truly is super easy.

First things first, turn the breaker off for the area you're working on. Then take out all the existing lightbulbs. Now you're ready to actually switch the light fixtures.

Next step is to remove the old light. For our lights I just had to get a grip on the trim of the existing fixture and then tug on it a bit. It can feel like you're pulling on the lights too hard but they're just held in place by some metal spring type things. Once you're done it should look like this.


Up next, take the portion of the new retrofit lights that looks like the bottom of a light bulb and then screw it into the socket.


Now all you have to do is tuck the socket and wires up into the opening in the ceiling. Once everything is in place, push the light into the housing. Again, there are friction clips that hold the light into place so just push it into place and make sure it's snug and not moving around.


That's it! Once you get all the lights in place, you can turn the breaker back on and admire your handy work.


I love how the lighting looks in the kitchen now. And since the new lights are LED we shouldn't have to change them while we're still living here. :) Being so close to the ceiling did make me realize that it probably needs to be painted sooner rather than later...that's thrilling news. If you're in the market for some updated recessed lights I'd encourage you to check these out, and let me know!

Hope you liked this little tutorial today! Enjoy the rest of the week friends!

Love,
K

Kitchen Reno: Part 1

Wednesday, April 26, 2017

Hi friends! I mentioned last month that we were about to get started with the kitchen renovation at our house and thought I'd finally provide an update. Let's start at the beginning...these are listing pictures but the only real changes were pictures taped to the fridge, and our cowboy pig cookie jar on the counter. :) There's going to be a lot going on so I figured I'd break the posts down and try to share in real time as much as possible. Today it's pretty much all about demo...


We're replacing the flooring, cabinets, counters, and back splash. The plan was to do the demo portion ourselves to help with the budget. A few weeks ago Loren removed all the cabinets and we started removing the tile. Thankfully a friend came and helped with that because he was way more successful at breaking up the tile than I was! We used a Bagster for all the debris and it was so easy. I'd highly recommend it if you're going to have a lot of construction materials that are heading to the dump. We were able to get all the tile up and then decided to have the flooring installation crew finish the demo of the subfloor.


It was a bear! They worked on the floor for days getting it ready for the flooring to get installed. The subfloor under the tile had been glued AND stapled over linoleum.


And here's a sneak peek of the flooring getting installed!


It's so exciting. All of the flooring is in now but the trim work isn't happening until next week because some piece needed was on backorder. We also have started installing a few cabinets in places where we can. Hopefully I'll be back with prettier photos and updates next week. And keep your fingers crossed that I can make a counter top decision within the next couple days. :) Hope you're having a good week!

Love,
K

House Updates

Wednesday, August 24, 2016

It's been a few months since I gave any updates on the house, I think the last status was right after we moved in so we've made a bit of progress. Not a ton, but some. Baby steps.

The family room is probably the room with the fewest changes. I did get new slipcovers for our couch and loveseat (Ektorp, Nordvalla dark gray) and a new mirror for the fireplace mantel. I love the new slipcovers! They make our boring ol' furniture seem new again plus we got the deal of a lifetime on them which always makes me like things more.


I'm working on painting the room and hope to have that done soon. Next update. Also on the lookout for end tables and curtains. Long term we'd like to have built-ins on the sides of the fireplace so I'm trying to decide how much effort I want to put into decorating that area.

Things are moving forward in the living room as well. I picked up some furniture from a Facebook sale group, while it's not perfect the price was right for a room that's barely used. The rug is from Target that I managed to snag during a rug sale a few weeks ago and the tables are from Wayfair. The tables were such a pleasant surprise, much higher quality than I expected and I'm thrilled with them. The rug is good too.


I'm working on the curtain situation. I picked them up from Homegoods but they still need to be hemmed and hung properly. I like to use thumb tacks to test the waters! Painting the living room is also on the horizon. And lamps. As pretty as the bare bulb lamp with chipped paint is, I think actual lamps meant for the space would be a good idea.

The dining room has been painted and we have chairs! I painted the wall about the chair rail Hale Navy by Benjamin Moore (color matched at Ace Hardware with Clark & Kensington paint) and the lower portion of the wall is Simply White also by Benjamin Moore (also color matched at Ace). Loren and I also made a magnetic frame for our magnet collection.


The trim still needs to be painted and I need to get the curtains hung up but having chairs was a huge improvement. Oh, and I picked up the rug from Ikea. It's the DYNT rug and our store also had it in gray but I'm not seeing it on the website. I liked that it was low pile since chairs need to move easily but still had some movement to it. Plus, the price couldn't be beat for such a large sized rug. We're still looking for two more chairs, a new light fixture, and some additional wall decor.

I did get the entryway painted and a gallery wall added to the space. The paint color is Anew Gray by Sherwin Williams and it's the same color that I'm painting the family room and other areas on the first floor of the house.


As you can see, I picked up a table from HomeGoods but haven't decorated it yet. We plan to replace all of the white tile but we're still trying to figure out what the replacement is going to be.

Okay, I think that's all for now. Upstairs is still sort of a hot mess, but we do have a bed! No more mattress on the floor. :) Some progress is better than nothing, and little updates make it feel more like our house which is good for my emotional state. As always, thanks for reading!

Love,
K
Dining Room Plans

Friday, May 13, 2016

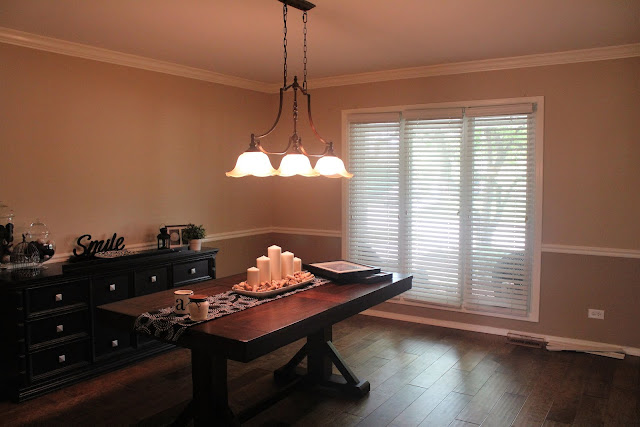
I really need to start making headway around this house so I've picked the first room I'm going to spruce up...the dining room. You might think, "huh, that's weird you barely cook!" and while that's true I'm trying to turn over a new "cooking" leaf. And, when Loren and I ranked our house to-do list this room seemed like it had the least to do. :)

This is a picture from the house listing: 


And here's what we're dealing with now: 


Once I knew we were going to buy this house, I had started thinking that I might like to incorporate a little more navy blue into our decor. In the dining room I thought doing a dark blue on the upper portion of the wall and then adding some molding and a white to the bottom would be pretty. Last week while perusing Pinterest I found the perfect "pin" that had the blue I was looking for but a lot of my comfortable beiges.
The picture is from an old post at The Creativity Exchange and I just thought it was awesome! Unfortunately, the fabric pictured is a little too spendy for my budget but I'm hopeful I can find something similar that will work.

Here's the to-do list for the room:
 - paint walls & trim
 - add molding to lower portion of wall
 - purchase rug
 - make/buy curtains
 - purchase chairs (might be the most important thing!)
 - add art/personalization/flare

I actually picked up a rug from Ikea already and like it in the space. Might seem backwards to get the rug first but it's neutral and I was antsy to take out some of the echo in the room! Hopefully I'll be back with some progress next week. Hope you have a good weekend!

Love,
K
Making a Tiny Backyard Functional

Friday, October 24, 2014

One of the biggest issues Loren and I have with our house is the tiny backyard. Even calling it a backyard is generous. It's more like a back patio. But, this summer we decided we needed to figure out a way to get more enjoyment out of the space.

We'd been dealing with this set-up:


It was okay, but not super functional. Especially if there were more than four people back there. So our goal was to make it more useful. At first we thought about just getting a different size patio table, but then we realized that maybe an outdoor couch or sectional would be better suited. And if we were having a BBQ or something we could just eat on the couch, that's what we normally do inside, why not outside?

The search for an outdoor sectional began, and I very quickly realized that they are extremely expensive. I was still keeping an eye out for some good deals but told Loren I was going to see about if there were any plans out there for making something ourselves. I found some plans that you built up some nice benches basically but people commented that they spent $600+ on the supplies, and I also saw some plans that involved using pallets but we just weren't sold on the idea. Finally after lots of Googling and Pinterest searches, I came across this tutorial from Be Happy...Be Me:


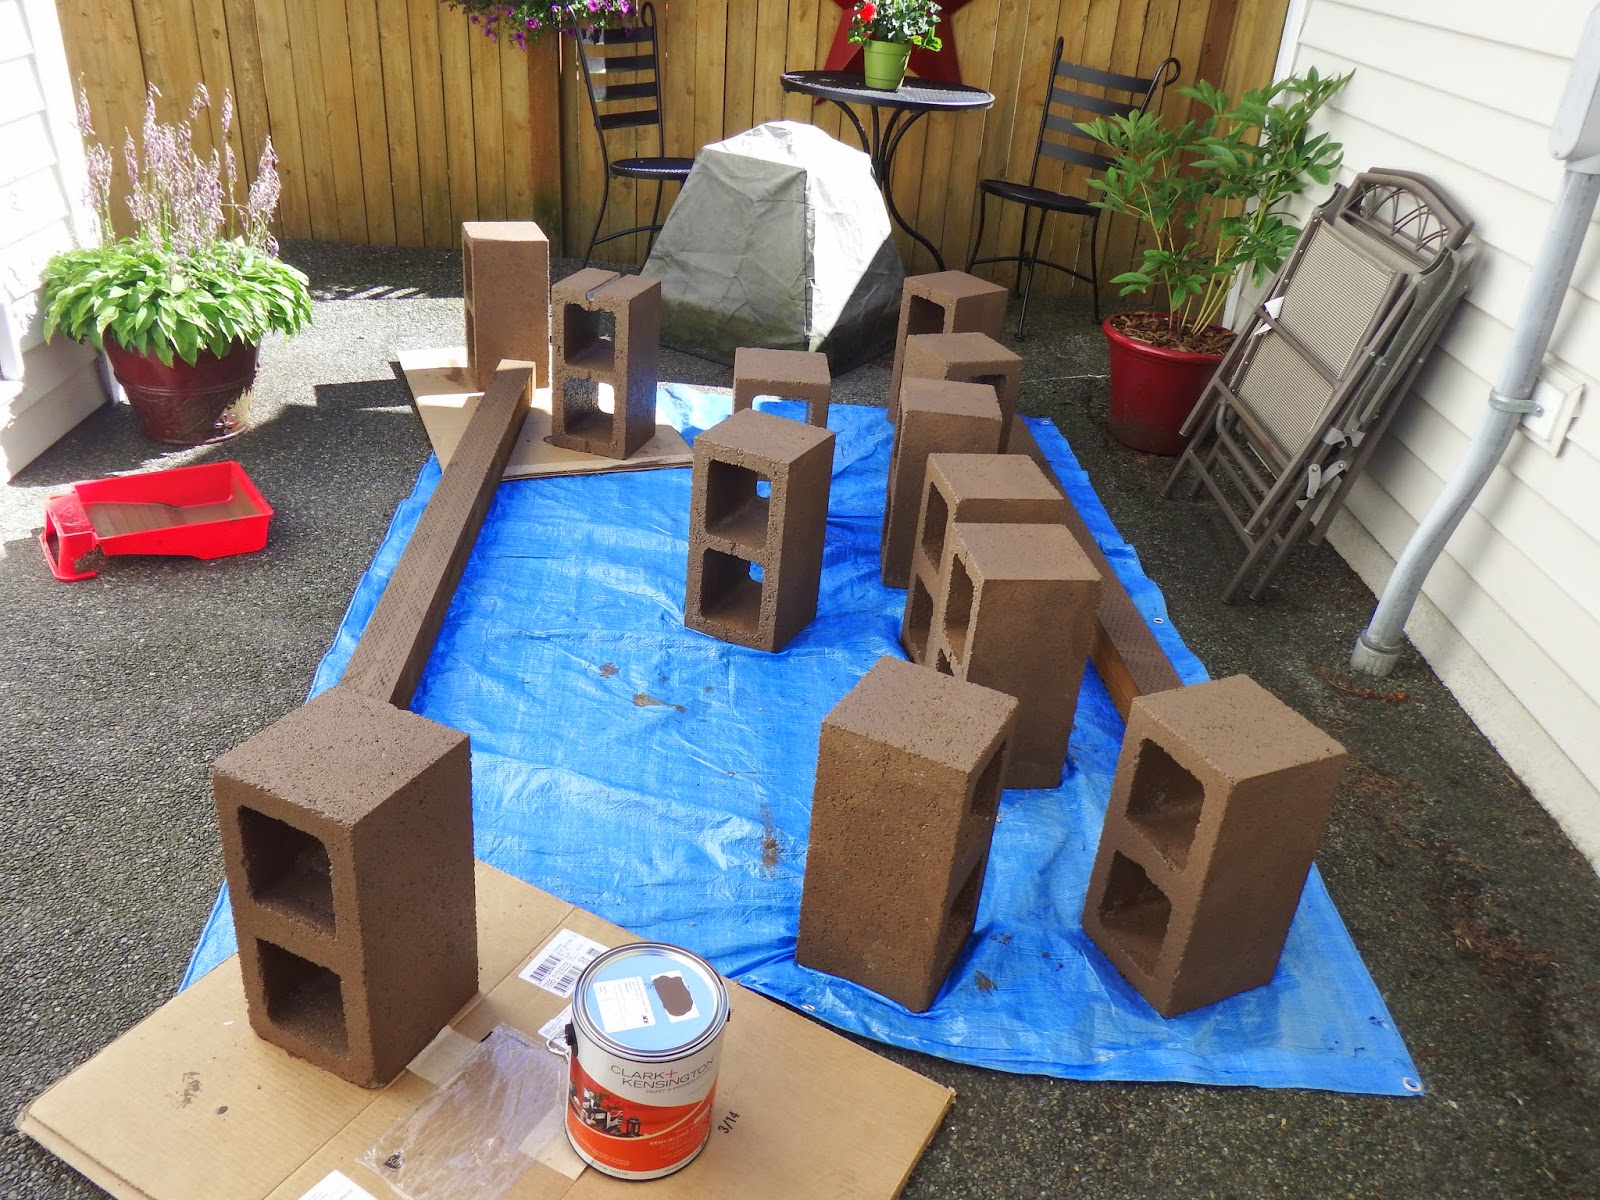
It was just what we needed! We got measuring to make this couch fit our space and decided to use six foot 4x4 boards with cinder blocks in the middle joining two sides together. We bought six 4x4's and 12 cinder blocks to assemble the couch. We also picked up some brown paint from Ace Hardware to paint the blocks and the front of the 4x4's that would be visible.


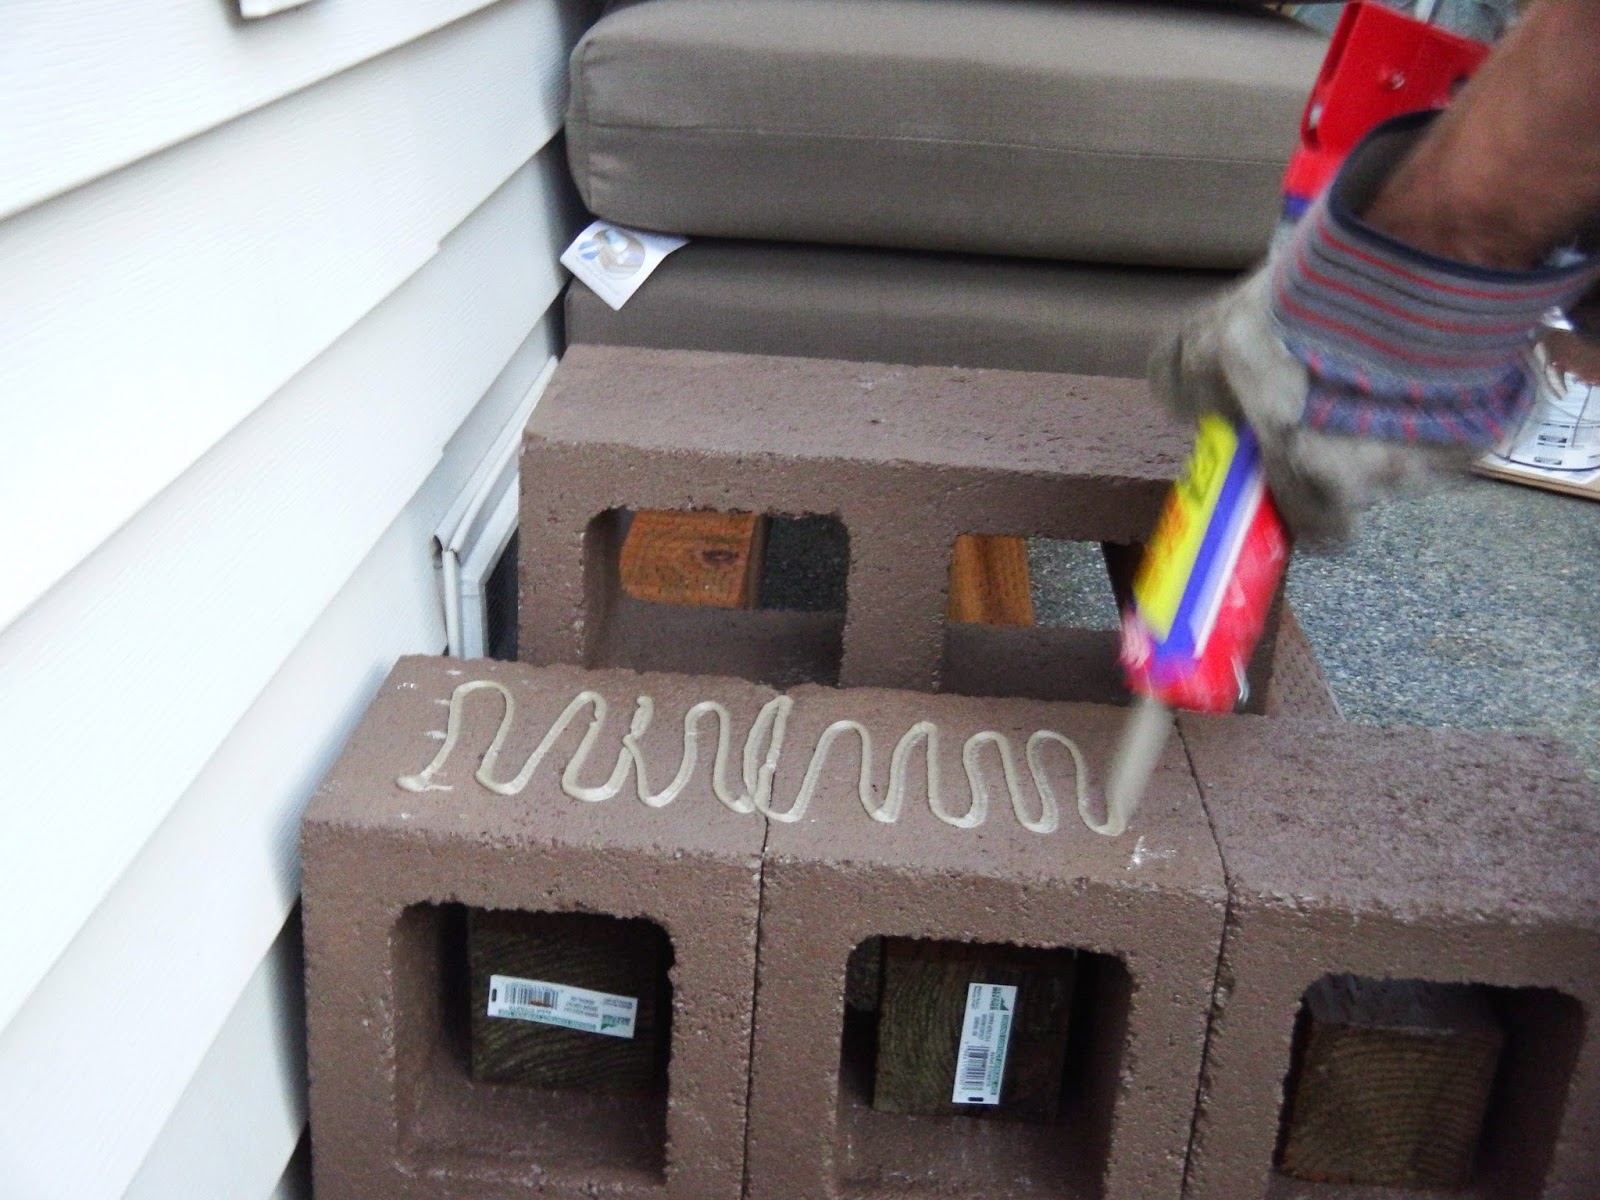
Let me tell you, painting cinder blocks is not fun. But we got it done and that was the majority of the work on this project. After the painted blocks were dry, Loren glued them together for extra stability.


After the blocks are glued together we just slid the 4x4s into the openings and adjusted as needed. Then added the cushions and pillows. Done-zo!


Ruby enjoys the couch too, she's a pretty cute model. :) After getting the couch made and set-up we added a couple chairs on the opposite side and strung some globe lights in between the house and the garage.


The lights had a nice vibe to the space I think. We managed to have a couple BBQs with friends before the cooler Fall weather arrived and it was really fun to be able to enjoy our outdoor space.


And that's how we made out backyard a little more cute, and a lot more useful. We'd still like to get a couple lumbar pillows and maybe a few more little accessories for the space but it's been a wonderful update for us.

Love, K

This Little Light of Mine

Thursday, July 28, 2011

For the four and a half years that we've lived in this house I have hated the lack of overhead lighting in our master bedroom. It was so dark in there which would really drive me batty when I was trying to pack a suitcase.


The past few months we finally got our booties in gear and started calling some electricians. During this process I've learned that electricians are a tricky bunch. You can call them, make appointments with them, and they'll just blow you off. Nice huh?! Just when I was about to lose my mind completely my sweet Loren got a recommendation from a coworker. And the best part about it was that the recommender does his research so we knew this electrician was legit. Yay for not burning the house down! AND he answered his phone. AND showed up to our house ON TIME! After he worked his magic we were left with a fancy new lightswitch (okay, it's not fancy just has two switches) and this lovely little box in the ceiling.


Pretty huh?! He did such a good job and was a tidy little worker too. Now it was hubby's turn to get to work. We've had the light fixture since uhh, February maybe? Loren installed it pretty quick and then it was showtime! Let there be light!!


Yay!! I'm so super jazzed about having this light in our room. It makes such a difference. I actually wanted to pack a bag today just for fun. Then I remembered that I'd just unpacked a bag (more on that another day). Oh well, point is...I can see everything very clearly now. And I like it.

Anyone else been working on a lighting project? Or living in a dark, dreary dungeon room for four years?! :) Tell me all about it!

Guest Room Paint Job

Tuesday, February 22, 2011

It took me FOREVER to choose a paint color after getting the new bedding for the guest room. Every paint chip I brought home was either too dark, too yellow, too...not right. I finally decided on Dove's Cry by Valspar but had it color matched at Home Depot so I could try out Behr Premium Plus Ultra - Paint and Primer in One. The new paint color is lighter than the previous color was so I thought it was a good time to give it a whirl. I was getting the room ready to paint and I found this:


A horrible patch job I'd done the first time I painted. In my own defense, it was the first time I'd ever patched anything. Anyway, it needed to be fixed because I was always trying to cover it up by hanging something up in that area. It's annoying to HAVE to hang something up. I enlisted Loren's help because obviously wall patching isn't my strong suit. In typical Loren fashion, he did some online research and found out that for our wall texture type there is a spray you can purchase to make things look brand new. Lovely! Here's the magic product -


The first step is to sand the old ugly patches up. Loren did an awesome job of that and I'm eternally greatful. I really really REALLY hate sandpaper. Even listening to him sand the wall gave me the heebie-jeebies. There were a ton of patches...whoopsie!


Once the wall is smooth, wipe it down and then it's time to spray the texture on the wall. According to the Loren it's important to do short quick sprays - like spray paint but don't continually spray. Also, you can adjust the thickness of how the spray comes out so testing it out on a scrap piece of wood or something is a good idea. We got the spray that comes out blue and dries white, cause I'm impatient and want it to be easy for me to know when I can paint it!

Finally, after getting the painting done...the wall looks AWESOME! I can't believe how great it turned out. It's hard to see but I think that just proves how well it worked!


And here's the completed room. I'm so happy with the end result. Well worth a Sunday afternoon of painting.

The color of the wall is best shown in this close-up pic below.

Now, I need to find some artwork for the walls and get the headboard made. Can't wait!

 
template design by Studio Mommy (© copyright 2015)